Table of Contents
The Fundamental Rehab Technique
It’s a classic that does so much more than the naked eye can see. This round of “Movement Deep Dive” focuses on the 90/90 hip lift, and some of my favorite variances off that move.
I hope you have your pen and paper handy to take notes, because this video is a long one.
If videos aren’t your thing, I’ve provided a modified transcript below. I would recommend both watching the video and reading the post to get the most out of the material.
Learn on!
90/90 Hip Lift Rationale
Hello party people! This is Zac Cupples bringing you another “Movement Deep Dive.”
Today we’re going to talk about everyone’s favorite exercise, the 90/90 hip lift. This is an exercise that has been made popular by the Postural Restoration Institute . There’s also variants seen quite a bit in the literature, published by Stuart McGill.
There’s a two factor goal with this activity. What we’re trying to do is normalize trunk and pelvic position in the sagittal plane.
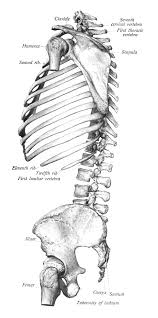
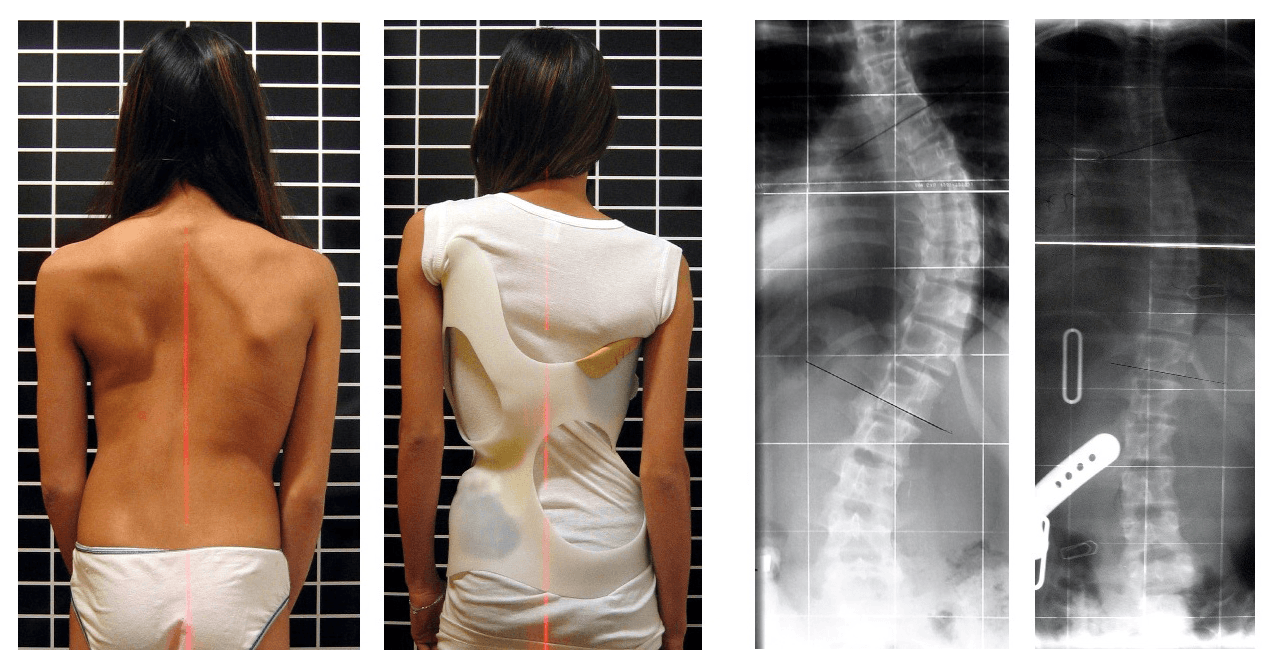
A lot of people present with an overextended posture at the pelvis and trunk, either unilaterally or bilaterally. The giveaways are rib flares and anteriorly tipped innominates, typically on the left side only or bilaterally.

This positioning limits range of motion, as progressing into extension borrows mobility and degrees of freedom from the frontal and transverse planes.
By moving out of extension into a more flexed position, we can increase the degrees of freedom that we have in those limited planes. This shift occurs by achieving a Zone of Apposition (ZOA). The ZOA is the amount of the diaphragm muscle that lies directly next to the ribcage.
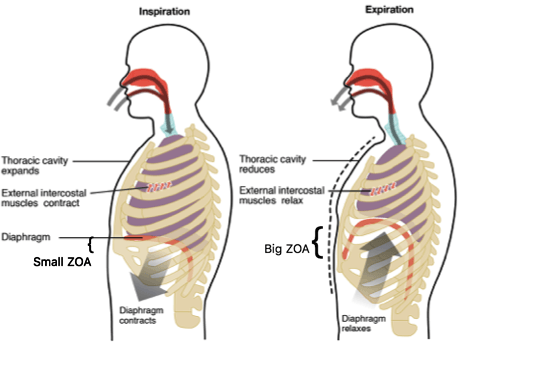
If the ribs flare up, the diaphragm descends, making the ZOA smaller. ZOA size increases as the diaphragm ascends and the ribs are pulled down, back, and in. Achieving this desirable ZOA and maintaining it as best as possible during inhalation is step one. The 90/90 hip lift is a great way to meet this goal.
We can also use the 90/90 hip lift to normalize pelvic positioning. By creating a posterior pelvic tilt, or at least moving the pelvis out of anterior tilt, we take the pelvic diaphragm/floor and align it with the thoracic diaphragm. These two diaphragms are then over the top of one another.
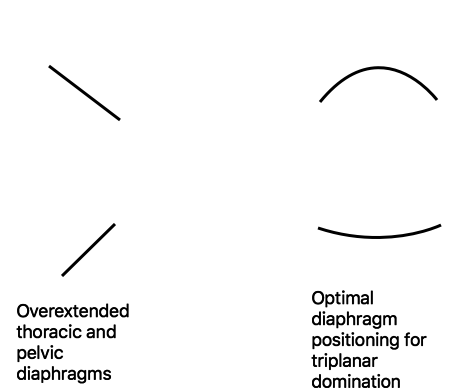
This position allows for greater intra-abdominal pressure to as we breathe, reduces hyperinflation, and puts the trunk in a better position to move in multiple planes.
Our two-factor goal then, is to combine a ZOA with a posterior pelvic.
How do we do that? I’m glad you asked!
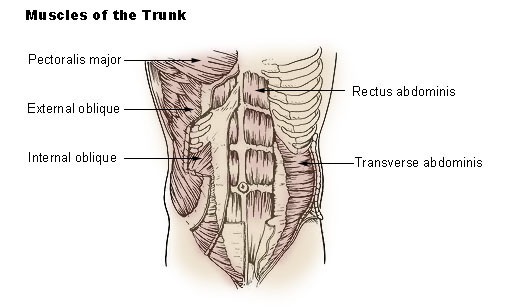
We need to recruit muscles. For the ZOA, we will contract internal obliques and transversus abdominis by a volitional exhalation. This action will simultaneously pull the ribcage down, back, and in; and because these muscles attach at the pelvis as well, they’ll achieve some degree of posterior pelvic tilt.
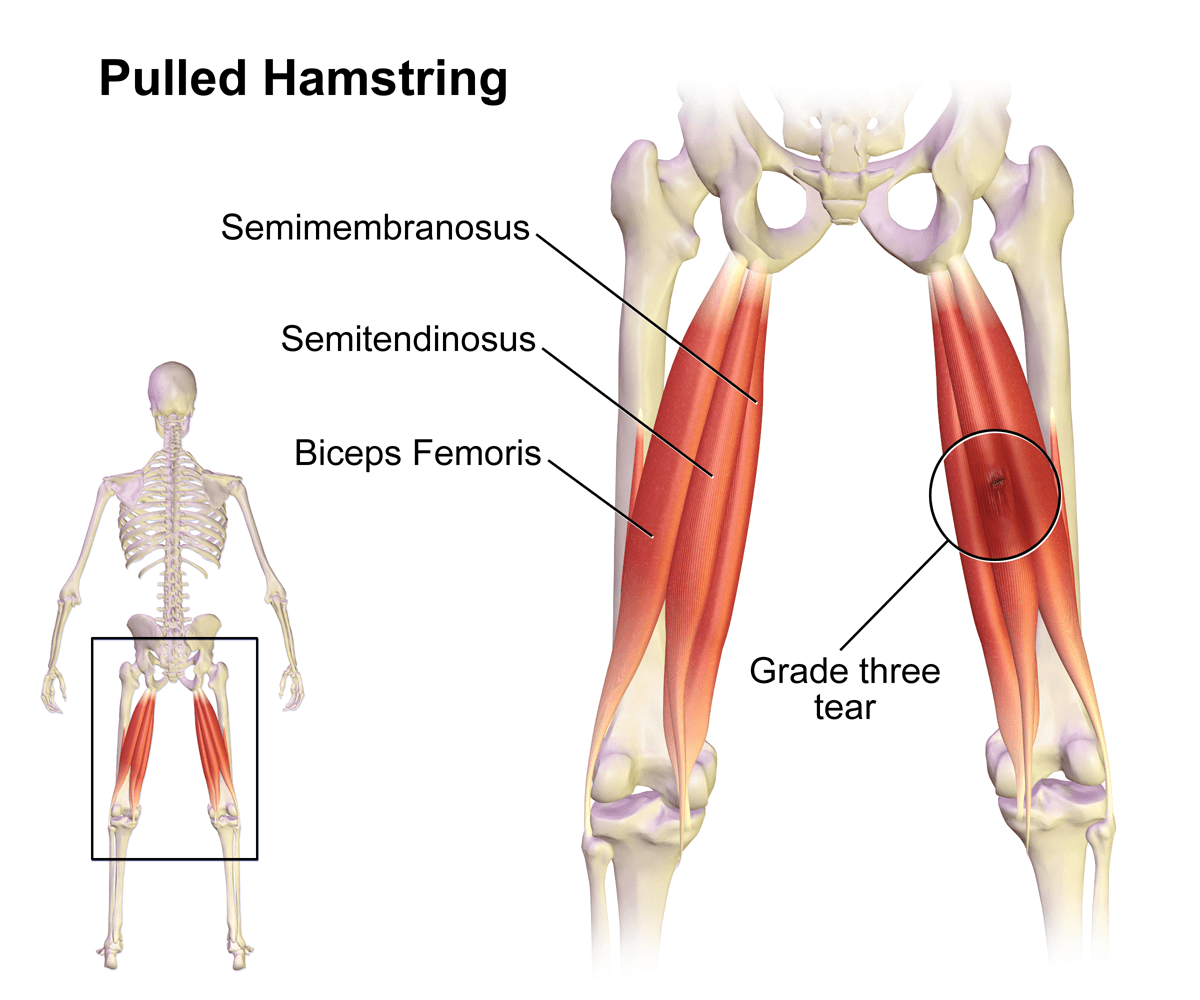
But of course, abs can’t do it all on their own. I have these cool muscles called hamstrings that attach right at the ischial tuberosity, and what they can do is postiorly tilt the pelvis from the bottom.
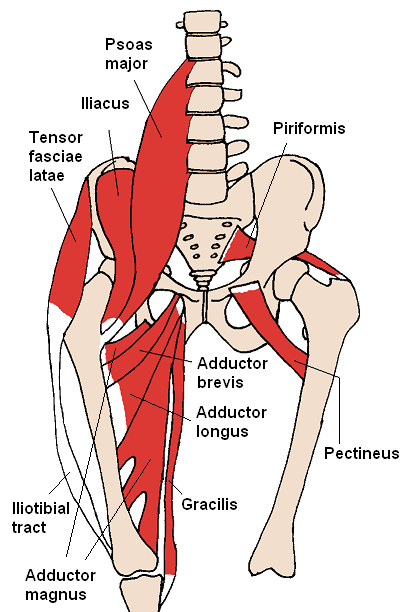
I can also make matters even better by contracting adductors. As the pelvis tips forward, the hip flexors relatively “gap” the pelvic inlet and “close” the pelvic outlet. This position descends the pelvic floor.
If I contract my adductor muscles, which attach along the outside of the pelvis, I can open up the pelvic outlet. An open outlet allows the pelvic floor to ascend.
Physiological Benefits of Paced Breathing
Now that we’ve gone over arthrokinematics, there’s also some cool things that we can achieve with the 90/90 hip lift from a physiological standpoint.
Let’s talk a little bit about breathing. We might use the hip lift to encourage a paced breathing strategy that normalizes pH and carbon dioxide levels.
If I have an individual who has a higher than normal respiratory rate and prone towards hyperventilation, which is quite common, pH balance is shifted towards alkalinity, or increased. Higher pH levels correspond with decreased carbon dioxide levels, aka respiratory alkalosis. This state is not desirable for many reasons. multiple reasons, but a pertinent example for our clients involves increase nervous system excitability, potentially increasing likelihood of experiencing pain.
By incorporating a paced breathing strategy, we normalize carbon dioxide levels. This change occurs by using a controlled pause, allowing carbon dioxide to build up, and normalizing pH levels.
Paced breathing will also be very calming and relaxing. The more time we spend with exhalation, the larger increase in parasympathetic nervous system activity¹. On the flipside, time spent with inhalation or hyperinflation is more sympathetically driven.
Hamstring are Important for Knee Health
Obviously we’re talking a little bit about more trunk and pelvis, but increased hamstring tone can have a favorable impact on knee position.
With an anterior pelvic tilt, the proximal hamstring attachment is elongated. This position reduces potential force generation and impact what will occur at the distal attachments around the knee.
The hamstring functions at the knee as a flexor and tibial rotator, but it also checks anterior tibial translation. If the hamstring is already pulled long, anterior tibial translation cannot be as readily checked or knee extension will be limited because end-range is reached sooner.
I find that by getting that hamstring activity a bit more normalized by addressing pelvic and trunk position, many individuals cease to have knee extension limitations. You don’t have to stretch a single thing! It doesn’t intuitively make sense to try to force this joint into full knee extension if you haven’t accounted for what’s going on at the pelvis and the trunk.
Who Needs the 90/90 Hip Lift
Now that we understand why we might use a 90/90 hip lift, let’s talk about who this is going to benefit.
Individuals who are extended either unilaterally ( Left AIC and Right BC pattern if you’re a PRI person, but Zink also mentions this pattern), or bilaterally (PEC pattern) would benefit from this activity.
Objective findings will include:
- Straight Leg Raise: Limited or hypermobile. We are looking for a 70-90 degree sweet spot
Remember, pelvic position pulls the hamstring long, so straight leg raise testing ought to hit end range sooner, appearing limited. Contracting the hamstring in a hip lift can normalize relative pelvic positioning, increasing straight leg raise range.
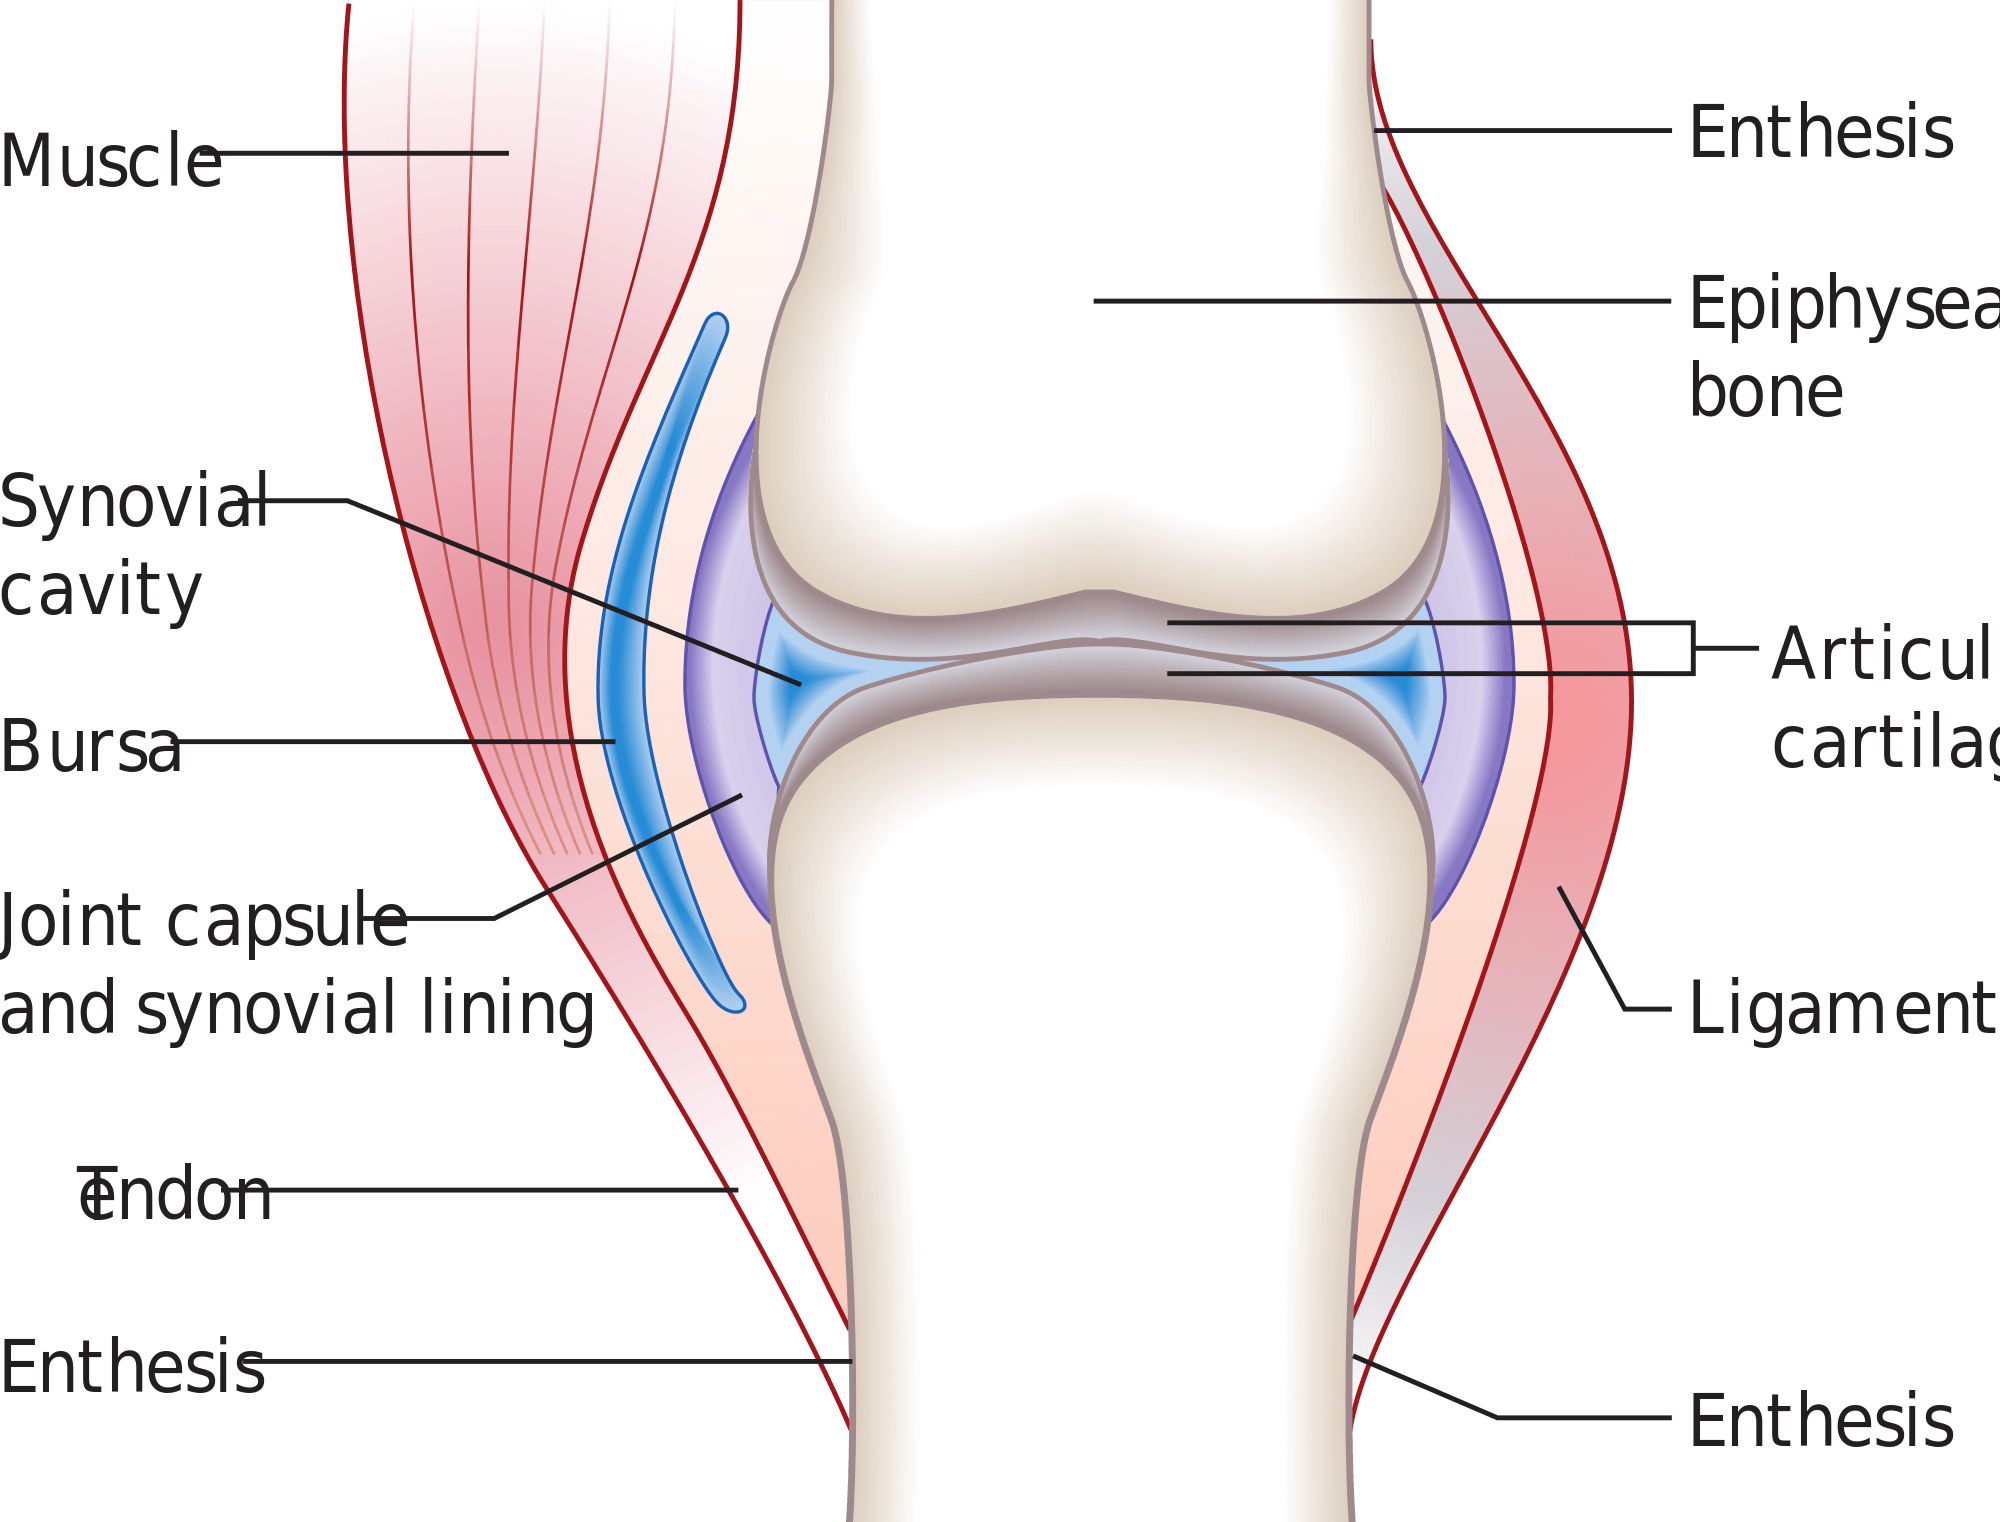
If someone has a full or hypermobile straight leg raise, there’s likely some laxity that has developed, likely at the sacrotuberous ligament because we know that you hamstrings and muscles don’t often get overstretched.
Ligamentous deficits can be overcome by increasing muscular demands, enhancing dynamic stability. Much like if I tear my ACL, the only thing that’s going to check anterior tibial translation will be the hamstrings. In this case, if have a hyper mobile sacrotuberous ligament, I would use a hamstring to effectively be a ligamentous muscle. This may favorably decrease the straight leg raise.
- Ober’s Test: Positive either on the left side or bilaterally
I know, This test looks at the IT band and you can’t stretch your blah blah blah blah blah!
We’re not talking about iliotibial band length. It’s a misnomer, they screwed it up! What we’re looking at instead is hip adduction range of motion. If the pelvis is anteriorly tipped, adduction capabilities will potentially be limited by several things: superior or inferior acetabular bony impingement, posterior hip restrictions, or hip flexor tone.
- Rib flares: Either unilaterally (more often left side) or bilaterally.
As we rotate the trunk to the left, the left rib cage externally rotates, and the right rib cage internally rotates. This movement would create a rib flare on the left side. This movement is necessary to face forward when the left innominate is anteriorly tipped.
The bilateral extension pattern progresses this by tipping both innominates forward, and consequently extending the ribcage to create the right rib flare.
- Shoulder Internal Rotation: Limited mostly on right, but could be bilateral.
This limitation occurs because of rib cage mechanics. In the unilateral extension pattern (right brachial chain), the right anterior ribcage is internally rotated. When these ribs achieve this position, the posterior aspect of the right ribcage increases kyphosis. This orientation alters how the ribcage sits underneath the scapula, pushing the scapula into protraction.
Normally we have an appropriate amount of kyphosis at the the rib cage and thoracic spine to match the concavity of the anterior scapula, but increased kyphosis will cause the scapula to “slide off the edge.” This situation is why rounded shoulder postures occur, more often on the right side.
In this state, shoulder internal rotation will be limited as the humerus is brought to relative neutral. This deficit will occur because the humerus glides anteriorly to end-range and impinges on the glenoid. Until proximal positioning is cleared, one cannot warrant stretching the posterior capsule or shoulder musculature.
Internally rotated ribs also make ipsilateral lung inflation much harder because there is reduced space along the chest wall. In the case of someone with left sided extension, the left lung will fill easier than the right due to there being more real estate for the lung to expand.
When to Use the 90/90 Hip Lift
This is one of my first activities that I give people in early phase rehab, and really I think that’s probably one of the only places that this technique is useful.
It can potentially be used as a warmup if you’re feeling a little bit stiffer than normal and the dynamic warmup just isn’t going to cut it, but but to me this activity shines the most when we’re intervening from a rehabilitation standpoint.
Let’s show you how to perform this impactful technique.
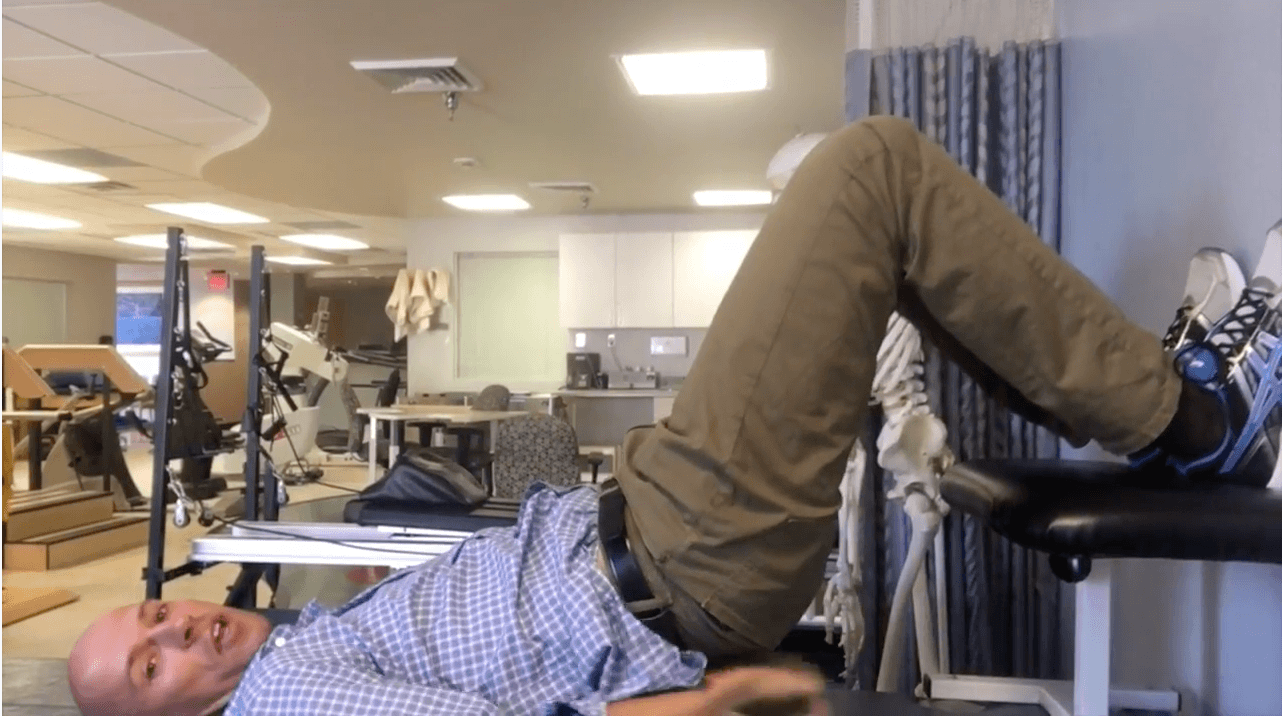
Performing the 90/90 Hip Lift
All right people. Here’s the equipment you’ll need to perform the 90/90 hip lift:
- A small 6-8 inch diameter ball, coffee can, or toilet paper roll (unused).
- A hard surface to place underneath the heels. This could be a flexion stool, chair, table, couch, or some type of ledge. This makes hamstring recruitment much easier.
- A wall
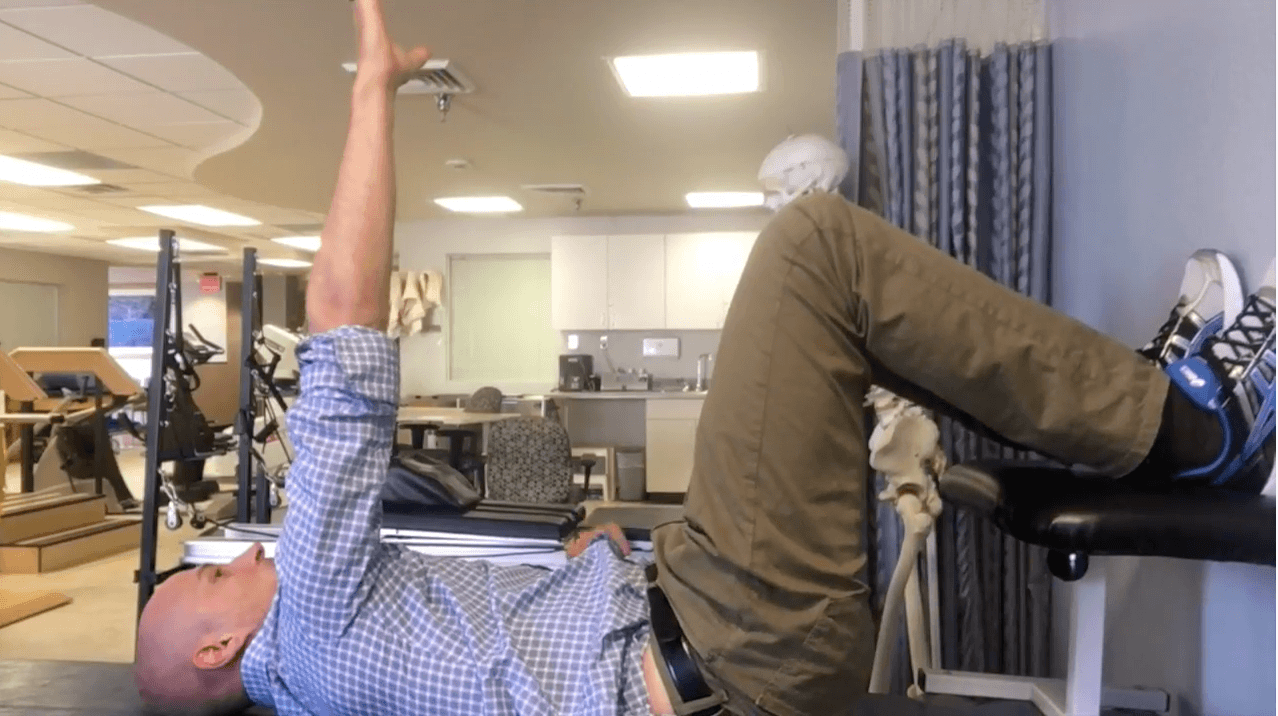
Here’s the setup:
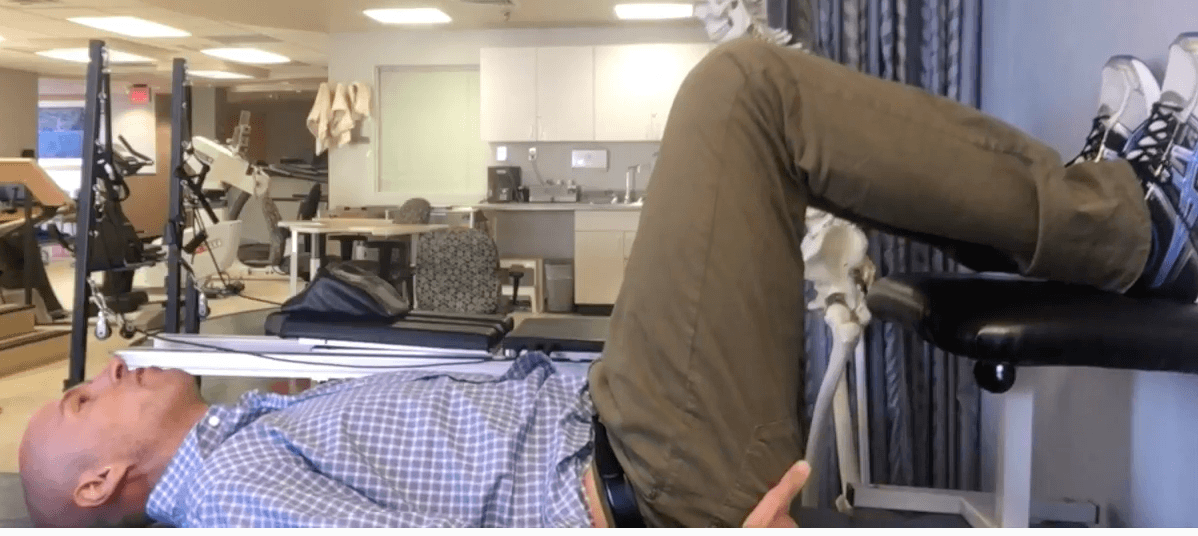
- Feet on the wall or back of the chair/couch
- Heels resting on the hard surface of choice
- Hips and knees at 90 degree angles
- Ball, coffee can, toilet paper roll (unused) goes between the knees
And here is how to perform the movement:

- Dig the heel down into the stool/table/chair/surface while keeping the feet glued to the wall
- Keeping the lower back contacting the mat, slightly raise the buttocks off the ground. The knees should move towards the ceiling.
- If performed correctly, you should feel the hamstrings engage
- Hold position for 5 breaths; in through the nose, out through the mouth, pause for a 3-5 count.
This variation is good for a person who’s unilaterally extended. If they’re bilaterally extended, place the femurs into slight internal rotation. This movement will bias the adductors a bit more, which will better allow the pelvic outlet to open up. Follow the instructions per above.
90/90 Hip Lift Breath Sequencing
Let’s talk about the breathing sequencing a little bit. Here’s how we’re coaching the paced breathing. Credit goes to Bill Hartman for teaching me a lot of these cues. To reduce rib flares, a complete exhalation is emphasized first and foremost. We want a controlled, prolonged exhale that finishes with a sigh. The sigh at the end helps get that ribcage to fully drop so all air is out.
After they’ve gotten that full exhale, allow their individual to quietly inhale. This quiet inhale allows us to keep this ribcage glued down, keeping a ZOA. Forceful inhalation will activate accessory breathing muscles and ZOA will be lost. I typically coach those two pieces first.
Once they’ve gotten the inhale and exhale down pat, then we’ll throw in the pause. What the pause does is that keeps us in that parasympathetic exhalation state a bit longer, allows the diaphragm time to fully ascend, and keeps the abdominals and hamstrings kicked in a little bit longer. They shall pause for a 3-5 second count.
Let’s review the sequence
- Quietly inhale through the nose
- Fully exhale throughout the mouth, sighing at the end. Feel the ribcage drop towards the mat and the lower back pressing harder into the mat.
- Pause for a 3-5 count
- Keeping the ribcaged pulled toward the mat, quietly inhale and repeat the cycle.
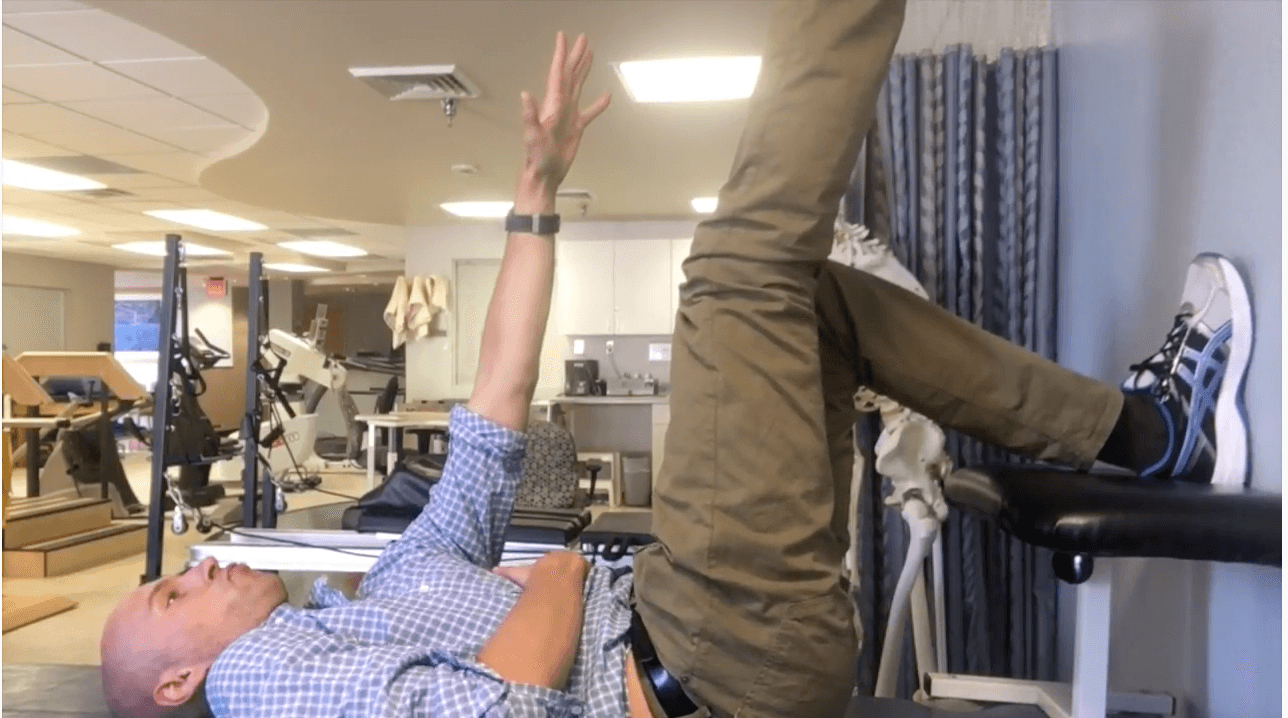
Biasing the 90/90 Hip Lift to Improve Shoulder Internal Rotation
Now say I wanted to address that right shoulder limitation that we had talked about. Simple fix. I need to bias the left abs a little bit more so the right apical lung can open up. An easy way to do that is by throwing the arm over the head, elongating the right side. Perform the exercise as described above. You should feel the left abs more engaged with this variation, as well as a stretch and expansion of the right chest wall during inhalation.
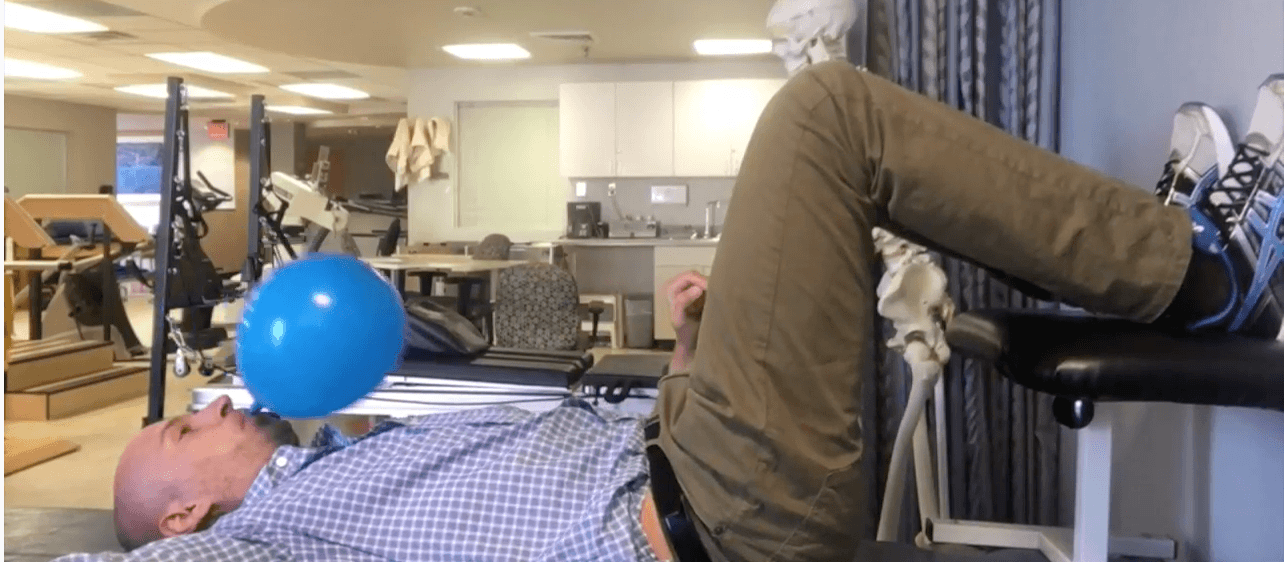
90/90 Hip Lift with Balloon
Let’s say you want to really wanted emphasize the breathing piece. You might consider using this newly enhanced therapeutic device called a balloon.
A balloon works differently than a straw or spirometer, namely because these tools focus only on forceful exhalation.
A balloon is both an exhalation and inhalation device. As I exhale into the balloon, resistance is provided to reinforce a forceful exhalation. But the real key is the inhalation and subsequent pause. When pausing, I have to make sure the air stays in the balloon (side note: it’s really funny when your clients suck in air from the balloon, so let them screw up first).
Air is kept in the balloon two ways. First, the tongue is placed on the roof of the mouth. This position puts some pressure on the palate and allow the neck muscles to relax. Now when attempting to inhale, accessory muscle use is reduced. In order to get air in, the rib cage must stay locked down, maintaining the ZOA by eccentric abdominal activation. This series of events promotes normal diaphragmatic descension during inhalation.
So the balloon is cool for a lot of reasons contrary to what the haters might say.
When first coaching blowing up the balloon, I don’t worry about the pause. I’ll let my peeps pinch the balloon between inhalation and exhalation.
Once mastered, the pause is integrated. I won’t let them pinch the balloon this time. Instead, they’re going to put their left hand right in front of balloon so it doesn’t go shooting all over the place. After a complete exhalation, pause breathing and place the tongue on the roof of the mouth. After 5 seconds, take another quiet inhale.
90/90 Hip Lift Progressions
Let’s now look at how we can make the 90/90 position more challenging.
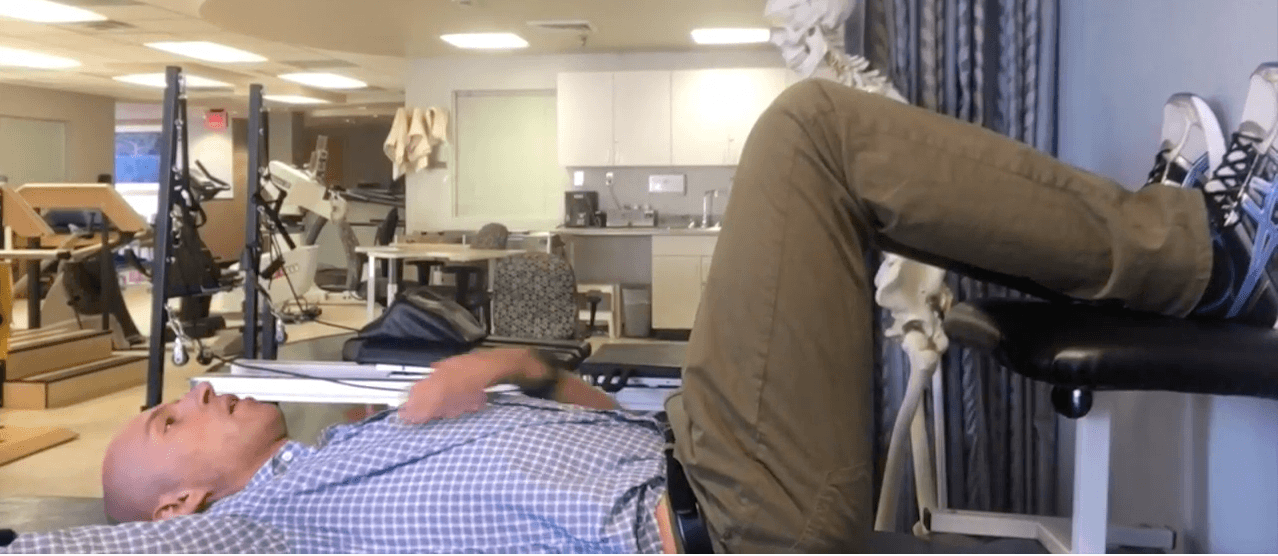
90/90 Hip Lift with Right Arm Reach
Let’s say your peeps are having a hard time really getting the left abs. A little tweak you can make is reaching the right arm towards the ceiling. The serratus anterior coactivating with the left abs rotates the trunk further to the left, better positioning the left abdominal to activate. With each exhalation, reach further toward the ceiling.
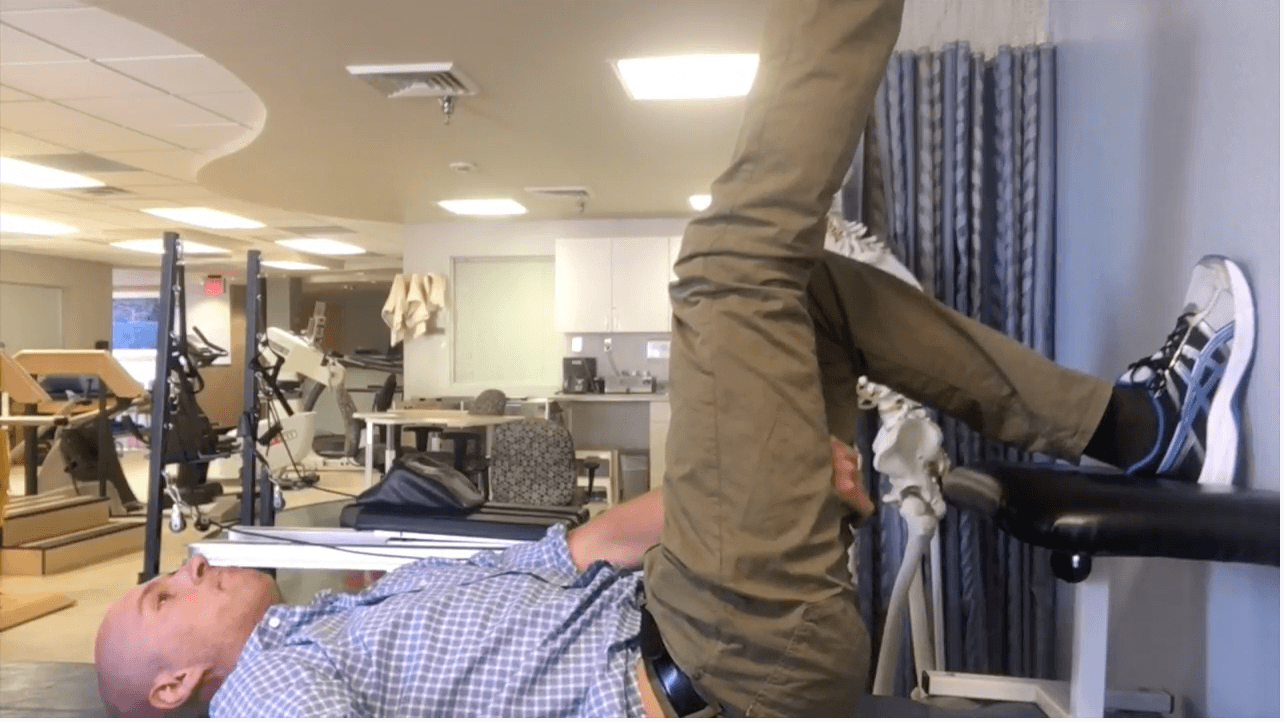
90/90 Hemibridge
Let’s say I want to make this a bit more intense from a lower body standpoint. To do so, lift one leg up in the air and perform the pelvic tilt. This variation is quite beneficial for individuals who are unilaterally extended.
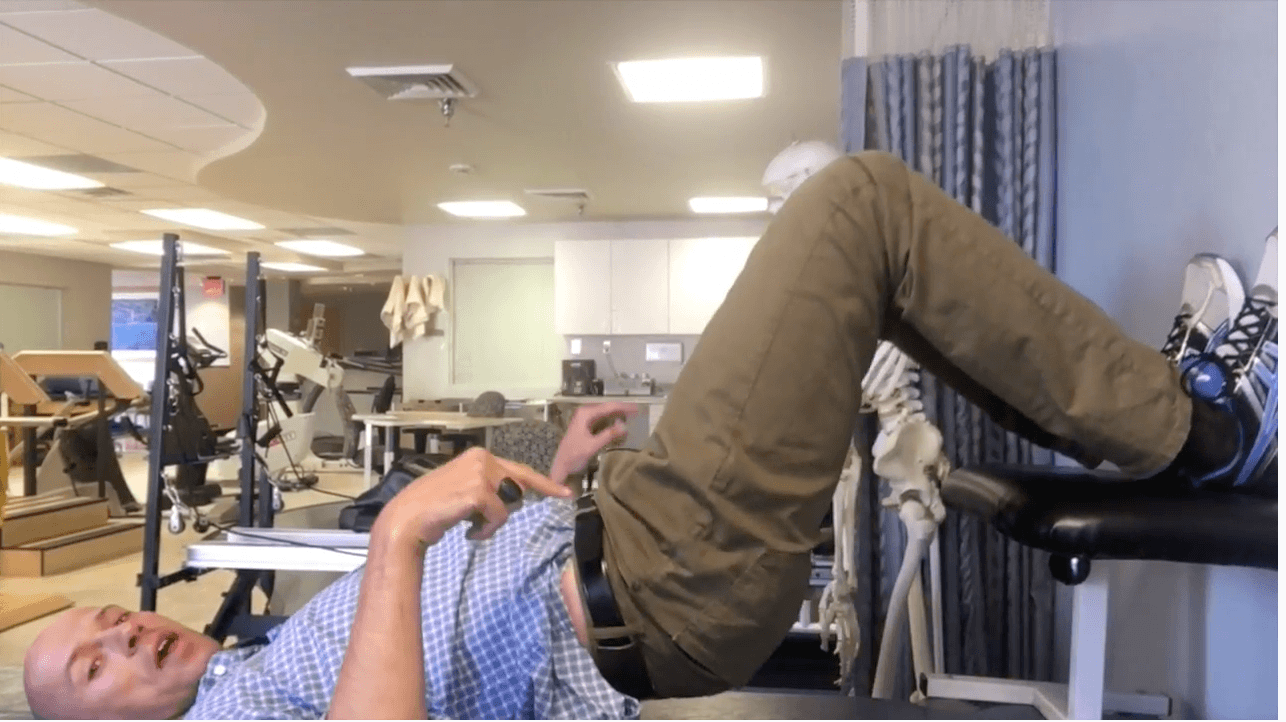
90/90 Alternating Crossovers
The pinnacle in my opinion is to combine the reach and straight leg. A slight difference happens with this move. Whichever leg is straight, the opposite arm does the reaching, and reaches toward the foot. Keep the left lower back glued to the mat. This cue will eliminate the tendency to extend during the reach. Perform 5 breaths, then switch sides.
This activity is great for those clients who are bilaterally extended because you’re getting them to alternate triplanar movement on either side, and that’s something we’ll all need to be able to do but especially those bilaterally extended individuals.
Common Errors in the 90/90 Hip Lift
Let’s talk a little bit about how our peeps will screw this up.
Screw up number involves pushing the feet into the wall, creating some kind of lame bridge. These clients are trying to extend, exhibiting an inability to coordinate flexion based musculature.
This error is why I use the stool. Before I would just have clients try to scrape the wall, which was very ineffective because they inevitably couldn’t conceptualize what I was trying to coach.
Instead, cue to push the heels down into that stool or chair. The wall is just there for feedback in terms of keeping your whole foot on the ground so it doesn’t seem like you’re hovering.
The other screw up involves lifting the entire lower back off the mat.
Zac: “No, you’re not.”
To fix this error, you can either put your hand underneath lower back and tell the client to keep the lower back touching the hand as he or she lifts the butt off the mat.
If they’re still not getting it, just have them squeeze their glutes a little bit because sometimes that might be enough to get a posterior pelvic tilt to activate the hamstrings.
Eventually you would progress them to the the former cue.
Other problems that will happen with this activity will be with the breathing side of things.
Let’s say they’re not achieving a full exhale. Make sure that you’re cueing a sigh, or you may put your hands on the ribcage and help guide them down into a ZOA.
If you’re not a fan of the balloons and you just want to emphasize the exhalation piece, use a straw or a spirometer.
Or perhaps they are inhaling too much air and the ribs are flaring. If you are using the “push the low back into the mat” cue, encourage your client to maintain that same pressure while taking in air. Also tell them the inhale needs to be silent.
Regressions from the 90/90 Hip Lift
Let’s say that the 90/90 position just isn’t happening for whatever reason. Typically, the reason will be that they cannot posteriorly pelvic tilt against gravity.
To regress, switch to quadruped, starting with a modified all four belly lift. It’s a bit easier to perform a posterior pelvic tilt here. Here’s how to do it.
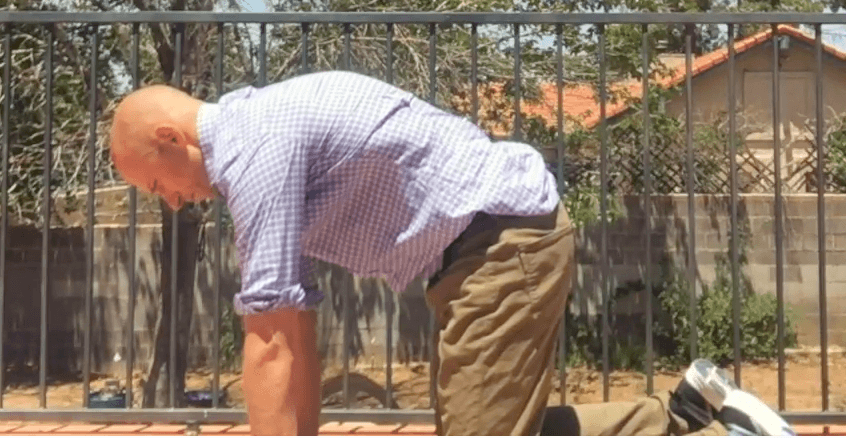
- Hands underneath shoulders
- Knees underneath hips
- Tuck the hips up underneath
- Push the arms into the ground (scapular protraction/rib retraction)
- Push the sternum towards the ceiling as if there was a needle with the Zika virus hovering right by your breastbone
- Perform for 5 breaths; quietly in through the nose, prolonged exhale finished with a sigh, pause for a 5 count.
- During the exhale, think about pulling the ribcage up toward the ceiling
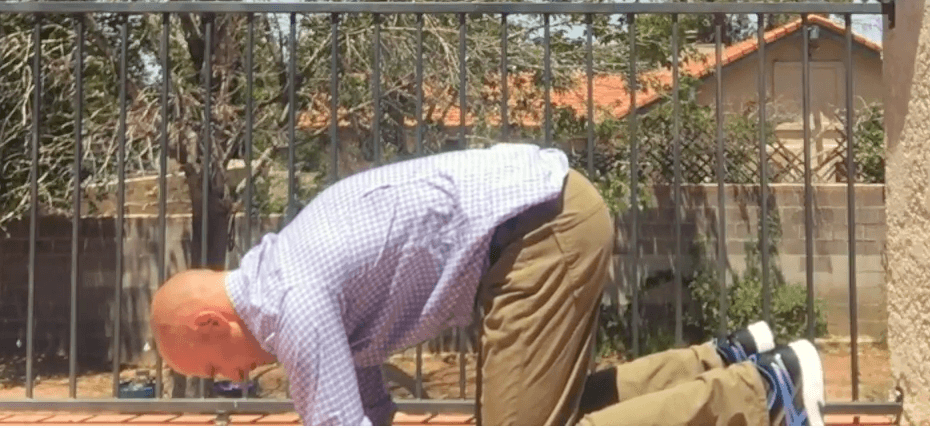
If this position is too challenging, such as if the client’s neck becomes tensed, switch to quadruped on elbows and perform as described above, this time pushing through the forearms instead of the hands.
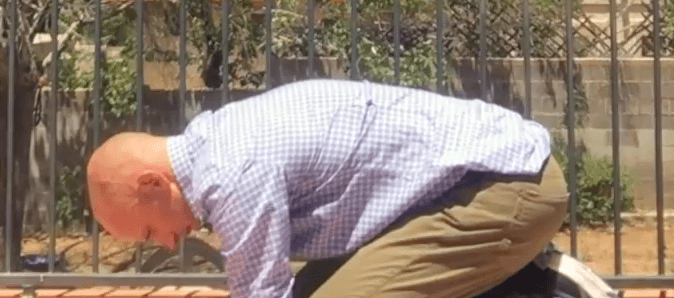
If quadruped on elbows is too challenging yet, rock the hips back onto the heels to force a posterior pelvic tilt—rockback breathing.
Sum Up
Alright guys, that’s it for today’s Movement Deep Dive on the 90/90 hip lift and its variants. That is about as exhaustive a lesson as you’ll find on such an important move. I hope you got a lot out of it.
The big takeaways:
- The 90/90 hip lift is a foundational movement with a goal of normalizing trunk and pelvic position.
- Establishing a zone of apposition (ZOA) and posterior pelvic tilt potentially allows more freedom to move in the frontal and transverse planes.
- Hamstrings, internal obliques, and transversus abdominis are the major muscles active during this movement.
- The hip lift is best suited for the early phases of rehab.
- The breath cycle involves in through the nose, out through the mouth, and pausing for a 5 count.
- Breathing retraining can be accelerated by using a balloon.
- Add arm and leg reaching to increase difficulty.
- Switch to quadruped to reduce difficulty.
Have any cues you like for this exercise? What are your big rock techniques? Comment below.
References
1 – Sapolsky, R. Why Zebras Don’t Get Ulcers
Recommended Relevant Resources
Exercises to Activate the Deeper Abdominal Wall Muscles: The Lewitt: A Preliminary Study
“The Common Compensatory Pattern” by Pope
.jpg)