Table of Contents
A Humdinger No Doubt
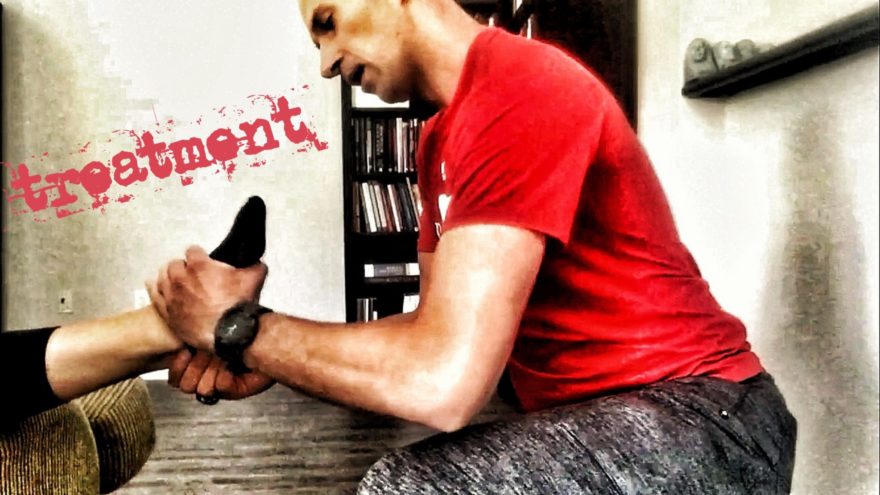
Ankle sprains. Such a bugger to deal with.
Ankle sprains are one of the most common injuries seen in basketball. The cutting, jumping, contact, fatigue, and poor footwear certainly don’t help matters.
Damn near almost every game someone tweaks an ankle.
Treating ankle sprains in-game provides quite a different perspective. Rarely in the clinic do we work with someone immediately post-injury. Instead, we deal with the cumulative effects of delayed treatment: acquired impairments, altered movement strategies, and reduced fitness.
The pressure is lower and the pace is slower.
You shed that mindset with the game on the line. You must do all in your power to get that player back on the court tonight, expediting the return process to the nth degree.
I had a problem.
Figuring out the most efficient way to treat an ankle sprain was needed to help our team succeed. I searched the literature, therapeutic outskirts, and tinkered in order to devise an effective protocol.
The result? We had 12 ankle sprains this past season. After performing the protocol, eight were able to return and finish out the game. Out of the remaining four, three returned to full play in two days. The last guy? He was released two days after his last game.
It’s a tough business.
The best part was we had no re-sprains. An impressive feat considering the 80% recurrence rate¹. Caveats aside, treating acute injuries with an aggressive mindset can be immensely effective.
Here’s how.
Step 1: Rule out Red Flags
Out of all the steps, ruling out red flags is by far the most important. This step requires quickly dichotomizing those who the protocol can benefit and those who require further medical attention. Get it right and you’ll have great success. Get it wrong and you’ll have major problems.

The last individual you want to attempt this protocol on is someone with a fracture. The Ottawa Ankle Rules mitigate this risk by stratifying those who need imaging, and are quite accurate at doing so. These rules have a sensitivity of 99.4 (97.9-99.8), and Negative Likelihood ratio of 0.018 (0.005 to 0.059)².
Here are the rules:
Inability to weight bear for four steps; both immediately and in the emergency room.
Tenderness over the distal 6cm of the tibia, or tip of medial malleolus.
Tenderness over the distal 6cm of the fibula, or tip of lateral malleolus.
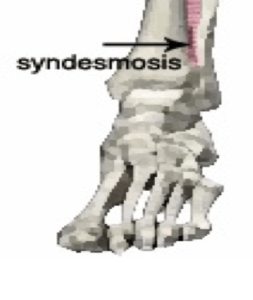
If these criteria are passed, you’ll next want to rule out a high ankle sprain. The best test is simply palpating the syndesmosis to ensure the area is not impacted³.
Once you’ve cleared out the bad stuff, check mobility and palpate the region to confirm a lateral ankle sprain. If ruled-in, the protocol is fair game. There isn’t good evidence to suggest we can accurately measure sprain severity³, and the techniques used in the literature are performed regardless of extent.
If it ain’t broke, go fix it!
Step 2: Manual Therapy
Once you’ve cleared serious pathology, it’s time to apply manual interventions. There is a decent body of evidence that suggests manual therapy can reduce pain and swelling in acute scenarios. These techniques outperform typical PRICE and NSAID strategies4,5.
My firsthand experience with acute sprains corroborates with this notion. Only one out of the four players who did not immediately return had swelling. Manual therapy seems crucial in reducing inflammatory processes.
Speed is primo when treating in-game, so joint manipulation is tier one. I start with talocrural distraction:
Then follow with a proximal tibiofibular manipulation:
After these techniques are performed, I provide sensory input to the distal tibiofibular joint:
After that, talocrural joint mobilizations are used:
If there is still some local sensitivity present over the affected area, I’ll perform some soft tissue techniques. First, I’ll hit the region where the anterior talofibular ligament resides:
If need be, working along the calcaneofibular ligament can be quite helpful:
Step 3: Band Ankle Traction
Credit Bill Hartman for teaching me this technique back in the day. Finally having the chance to apply band ankle traction in the acute scenario has shown me the wonders of this method.
Basically, superbands are wrapped around the client’s shoe, and traction is applied as he or she moves the ankle. Get the ankle muscles burning and you’re good to go.
I’ll have my clients perform 2-3 rounds of 10-20 reps of the following moves:
Ankle dorsiflexion/plantarflexion
Ankle inversion/eversion
Ankle circles clockwise/counterclockwise
Here’s how to do it:
Once completed, have the client get up and test the waters. Oftentimes he or she will be able to resume play immediately after this technique.
Step 4: Address Neural Sensitivity
Most ankle sprains sustain some damage to the superficial fibular nerve6. This occurrence can create some neural sensitivity. Many cases that still hurt after steps two and three fall into this category.
Performing neural sliders and tensioners can reduce neural sensitivity:
Many times these techniques will reduce pain with walking and jogging, but symptoms may persist at more intense movements. The straight leg raise and slump test may even be negative.
Don’t get punked by these tests like I have. It’s possible that the nerve only becomes sensitive under high load. Simply having the client reproduce the offending movement while slumping is a great way to both test and treat neural loading problems:
If symptoms improve with a maneuver such as above, have your client progressively reduce the amount he or she slumps until the offending movement is performed pain-free.
Step 5: Restore Sagittal Plane Ankle Control
The first four steps will get most sprains and tweaks back to play immediately. If the client still complains of discomfort, address systemic motor control next.
The body shifts weight anteriorly as a normal protective response, which consequently increases gastrocnemius tone. This strategy can reduce ankle dorsiflexion range of motion, a common compensation with ankle sprains.
While manual therapy can be effective at restoring dorsiflexion, the client must still learn how to actively dorsiflex without pain. The technique below is quite effective at doing so:
Once the client can successfully open-chain dorsiflex, we then retrain the movement in the closed chain:
Keeping the heel glued to the ground, cue your client to push his or her knee as far forward as possible.
Once completing the above activities, have your client test to see if we are a go.
Step 6: Restore Frontal Plane Ankle Control
Perhaps your client has killed steps one through five, but is still having some problems. Here is where frontal plane restoration is critical.
Inversion sprains are the most common injury mechanism. Try this at home. Progressively invert your foot. As you continue to move, what motion occurs at the hip?
The answer is hip adduction.
This finding makes sense as to why gluteus medius activity is commonly reduced post-ankle sprain¹. The gastrocnemius both plantarflexes and inverts the foot, which contributes to the leg drifting into hip adduction. This shift would favor increased adductor activity.
Considering the gastrocnemius increases tone with ankle sprains, the hip adductors can become overactive while reciprocally inhibiting hip abductors. Consequently, this altered muscle tone will progressively force both the ankle into inversion and hip into adduction. Throw in a supinated foot, and you have all sorts of nasty.
This vicious cycle could be a contributing factor to persistent pain, high re-injury incidence, and chronic ankle instability development¹. These problems are compounded if your client has a rear foot varus and cavus foot type7.
The task at hand would incorporate antagonistic postures to reinforce neutral positioning in the affected limb. This environment both increases limb stability, reduces strain on affected tissues and provides muscular stability in place of ligamentous laxity7.
To address this impairment, activities that combine hip abduction and ankle eversion work wonders:
Eventually, the client will progress towards everting the foot with the hip abducted in the closed chain:
Again, once the tasks are complete, check to see if your client feels comfortable returning to play.
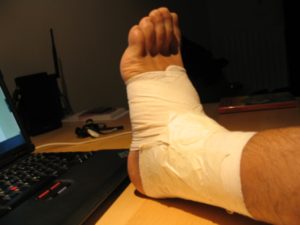
Step 7: Tape & Brace
Though this step can be used as a precautionary measure after any cleared step, taping and bracing can provide temporary reinforcements to help finish the game.
A simple technique, that sensorily reinforces the manual interventions performed is taping the lateral malleolus into a posterior glide8.
You can also perform traditional ankle taping if that’s your bag, as it can reduce injury recurrence6.

Sum Up
The above protocol has been quite successful at quickly returning clients to play post-ankle sprain. The less tactical time missed, the better conditioning maintained, the lower overall injury risk we have.
To review:
Rule out
Manual therapy
Traction
Neurodynamics
Sagittal plane
Frontal Plane
Tape as needed
Have a method you like that returns clients back quickly? Comment below and let us know.
References
- Friel K, McLean N, Myers C, Caceres M. Ipsilateral Hip Abductor Weakness After Inversion Ankle Sprain. Journal of Athletic Training. 2006;41(1):74-78.
- Beckenkamp PR, Lin C-WC, Macaskill P, Michaleff ZA, Maher CG, Moseley AM. Diagnostic accuracy of the Ottawa Ankle and Midfoot Rules: a systematic review with meta-analysis. British Journal of Sports Medicine. 2016;51(6):504-510. doi:10.1136/bjsports-2016-096858.
- Netter’s Orthopaedic Clinical Examination.
- Truyols-Domínguez SCA, Salom-Moreno J, Abian-Vicen J, Cleland JA, Fernández-De-Las-Peñas C. Efficacy of Thrust and Nonthrust Manipulation and Exercise With or Without the Addition of Myofascial Therapy for the Management of Acute Inversion Ankle Sprain: A Randomized Clinical Trial. Journal of Orthopaedic & Sports Physical Therapy. 2013;43(5):300-309. doi:10.2519/jospt.2013.4467.
- Loudon JK, Reiman MP, Sylvain J. The efficacy of manual joint mobilisation/manipulation in treatment of lateral ankle sprains: a systematic review. British Journal of Sports Medicine. 2013;48(5):365-370. doi:10.1136/bjsports-2013-092763.
- Al-Mohrej OA, Al-Kenani NS. Acute ankle sprain: conservative or surgical approach? EFORT Open Reviews. 2016;1(2):34-44. doi:10.1302/2058-5241.1.000010.
- Shawen SB, Dworak T, Anderson RB. Return to Play Following Ankle Sprain and Lateral Ligament Reconstruction. Clinics in Sports Medicine. 2016;35(4):697-709. doi:10.1016/j.csm.2016.05.012.
- Mau H, Baker RT. A modified mobilization with movement to treat a lateral ankle sprain. International Journal of Sports Physical Therapy. 2014;9(4):540-548.
Recommended Relevant Resources
The Biomechanics of the Foot and Ankle
PRI Impingement and Instability Manual