Table of Contents
Aka How I Mastered the Sagittal Plane
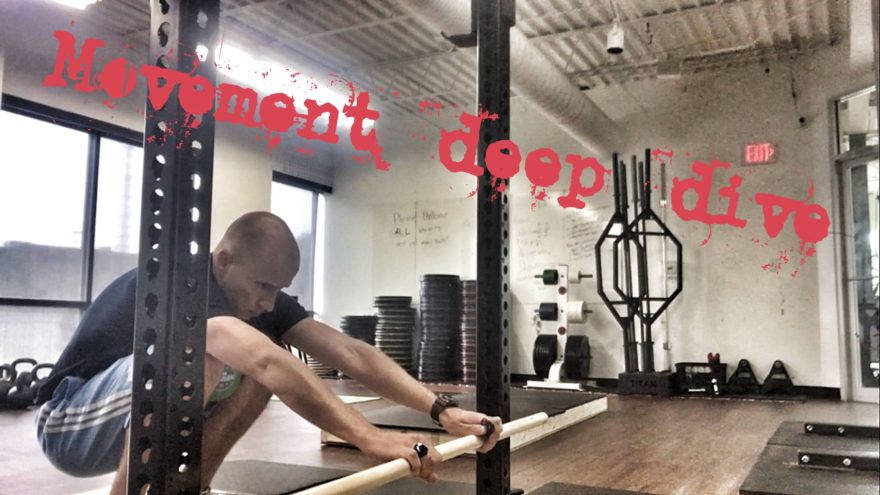
In our first episode of “Movement Deep Dive,” we go over one of my favorite moves, the squatting bar reach. It’s an excellent technique and I hope this video explanation is helpful.
If videos aren’t your thing, I’ve provided a modified transcript below. I would recommend reading and watching to get the most out of the material.
Learn on!
Squatting Rationale
Today’s Movement Deep Dive is going to focus on perfecting the squatting bar reach.
This is an incredible technique that I learned from the Postural Restoration Institute and it has several important goals that it can achieve.
It is a masterful position to inhibit all extension based musculature; namely the the erector spinae, gastrocnemius, and other muscles.
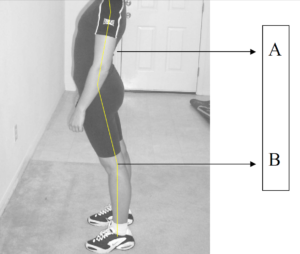
A lot of us fall into a protective strategy where we get an excessive anterior pelvic tilt—aka the J-Lo, as my good friend Jae Chung likes to call it—and the ribs flare up. This eccentrically elongates the abdominals.

In order for us to inhibit these extension-based muscles, we must close the rib cage down, back, and in; and then posteriorly tilt the pelvis. These moves will stretch all the muscles along the backside and allow us to descend into a squat. The abdominals are critical in order to do that.
They also allows us to change trunk levels effectively by orienting the thoracic and pelvic diaphragms to form a canister that allows for 360 degrees of intra-abdominal pressure to develop as we descend and ascend.
Another important function of this technique is to increase posterior hip mobility, namely the pelvic outlet. As I descend into the squat, I progressively posteriorly tilt my pelvis, the outlet must open up. Several muscles, such as your obturators, piriformis, glute max, and illiococcygeus allow that to open up. The squat does a great job of enhancing mobility in that area.

Another important function of this technique is to teach our clients to be able to push their knees forward, allowing a positive Shin angle and anterior tibial translation.
I know a lot of clinicians will advocate for people in knee pain to utilize vertical tibia strategies—RDLs, hip hinge activities, box squats, what have you—and these are very good techniques to use in the early phases of rehab.
The reason why they’re effective is because they increase hamstring activity. Now the hamstrings’ function at the knee joint itself is to reduce or check anterior tibial translation, like a muscular ACL.
When I have hamstring hypo-function, the quadriceps are able to run free and allow for increased anterior translation. This is an unfavorable position for our knee joints to go into when done to the nth degree. So, if we can recruit the hamstrings early on by vertical shin activities, that may may check quad dominance with our movements.
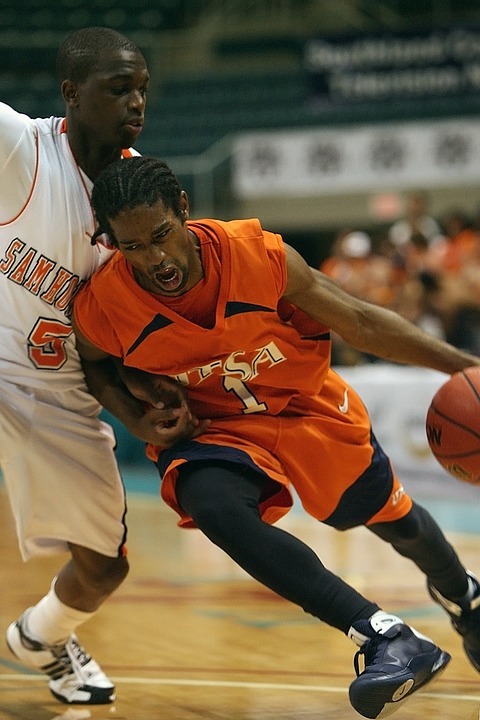
One problem with this is that rarely in life are we just moving with a vertical tibia. Consider a basketball player who has to drop into a defensive stance and shuffle side to side, or maybe any time you walk, or if you climb up a hill, go up stairs. Life involves pushing the knees forward and translating the tibias forward.

In order to effectively teach our clients to be able to do this without increasing that anterior tibia translation, having our individuals tuck their hips allows hamstring activation at the proximal attachment. This move creates a little bit of check on anterior tibial translation as we push those knees forward, so it’s a safer position for us to put the knee in.
Moreover, if you keep heel contact that allows us to stay shifted backwards into our hips because heel contact gives us a more favorable balance point for us to move in.
The last thing that this technique does really well is teaches closed kinetic chain ankle dorsiflexion. Now a lot of people will test ankle mobility with a wall ankle dorsiflexion test or a half kneeling dorsiflexion test, and you know if someone is limited with these maneuvers that the treatment will look to increase ankle mobility. Be it with a soft tissue or joint technique.
The problem is is when you test a single joint movement in varying positions, there’s multiple influences aside from just ankle mobility that can impact that movement.
For example, if I excessively anteriorly pelvic tilt and try to dorsiflex, I’m going to hit and range a lot sooner because I don’t allow the knees to push forward fully. I hit the end range at my hips. Moreover, say I have someone who has a flat foot and I’m testing them in standing. If their foot is already in this pronated state, they’re going to bump into end range a lot sooner than if they had a more neutral foot type. This would be creating a supposed dorsiflexion limitation that isn’t there.
If we can teach our individuals to effectively squat while keeping a good pelvic and foot position position, we allow true expression of ankle mobility that is functional.
Who Should Squat
This is one of these scenarios where I think almost everyone would benefit from some type of squatting maneuver. Now is everyone going to go ass-to-grass on this? Absolutely not. I’ve treated a guy who had a fused ankle there was no way he could do a full squatting bar reach. It’s just it’s not going to happen.
That said, there’s other ways that we can maybe adjust these maneuvers so he’s at least able to get his his diaphragms in a good position and be able to push his knees forward. Maybe not from a into a positive shin angle, but from a negative shin angle to vertical as an example.
Another example of someone who may not be able to go into full depth would be a basketball player. These individuals typically have some limitations in ankle mobility, or at least an inability to translate their knees forward in a way that we’d like; but even working mid ranges is beneficial.
Placing the Squat into Your Program
If I am a performance client, the two times I would use this would be either on a low day or as part of a warm-up.
In terms of application of this technique on a low day, typically low days involves some type of conditioning where cognitive demand is quite low. This might be a great way for us to teach individuals how to perform this technique because we can focus our cognitive demands on the squat.
It’s also good on a warm up obviously because of a lot of the reasons that I mentioned previously—improve ankle mobility, teach abdominal control, so on and so forth—especially if you’re squatting on a given day.
In terms of rehab I would use this very early on because one of the first things that we’re trying to do with our clients is establish sagittal plane control. This is a phenomenal technique to do it and it’s a functional technique.
The one time I would not use this is as a loaded exercise. This is an expression of mobility. Period.

When you are loading someone in a squat, you’re not going to have this much of a degree of posterior pelvic tilt or lumbar flexion. It’s just not safe from a spinal position.
Now we may use this technique to be able to encourage individuals to push out of the bottom of the squat using their glutes and hamstrings, which may may give us some carryover to loaded squat activities; but we’re not wrenching people into these positions with axial loading.
Now let’s get into showing you how to do it!
Assessing the Functional Squat
Before I use the squatting bar reach, I will look at the PRI functional squat test.
How to perform:
- Cue the feet pointing forward
- Arms out in front
- Tuck the hips
- Push the knees forward
- Attempt to descend into a full squat maintaining steps 1-4.
Most people won’t be able to do a full squat.
Performing the Squatting Bar Reach
To perform a squatting bar reach, you’re going to need two things;
- A dowel rod or PVC pipe. If your patients don’t have this at home I’ve had them slide their hands down the door frame or I’ve had them just hang on the kitchen sink depending on what depth they can achieve.
- A small ball. Paper towel roll or roll of toilet paper (unused)
Here are the steps:
- Feet point forward
- Dowel rod on other side of the rack.
- Acromion process (tip of the shoulder blade) is directly over the mid foot. This allows us to balance our trunk as we change levels. Acromion ahead of the mid foot promotes extension; behind the mid foot promotes falling. This principle is the same with loaded squats. The bar path is most efficient when it is in line with the mid foot. Since there is no “weight,” the acromion acts as the bar.
- Tuck the hips (Best Michael Jackson impression).
- Fully exhale to drop the ribcage. This creates the cylinder we talked about.
- Push the knees forward while keeping heel contact.
- Descend into the squat. Slowly progress depth over time.
- Inhale quietly through the nose, long exhale; pause for a 5 count.
- Can perform as repetitions or 3-5 rounds of 5 breaths.
While inhaling, you’ll feel the upper back getting a nice big stretch. The reason why that’s occurring is because when I close the ribs down and the air has to go somewhere. So it’s going to expand the ribcage laterally and allow the posterior mediastinum to open up.
If the abs aren’t engaged, inhaling will lead to anterior/abdominal expansion. That’s not desirable.
Hamstrings should also engage as the knees are pushed forward by a posterior pelvic tilt. You’ll also feel quads.
The eventual goal would be to get most clients to full depth.
Common Squatting Errors
Let’s talk about what could go wrong because your people will screw this up!
The first thing that I see a lot is an inability to tuck the hips. Instead, they do what I call “Fat Joe doing the lean back,” so they just translate the hips forward. They’re going to be a couple reasons why this is. Maybe they just don’t have that control so you may put them in a regressed position or you just have to cue them to bring the hip bones up. Sometimes just doing a gentle squeeze of the glutes can give them that awareness.

Another thing you might see people who are super flexible drop all the way down but but keep relatively vertical shin angles. We don’t want that either and the reason why we don’t want that to happen because then we’re not getting any hamstring activation to push the knees forward. This problem can be fixed by making sure that their shoulders are along the mid foot line. If I’m too close to the rack I can drop down easily.

Another common mistake that you’ll see is when people are coming out of the bottom. They might beautifully descend all the way down into a full squat, but might use back extension to ascend. This is a concentric control problem. Reinforce tucking, slowly rising, and staying scrunched. It’s also possible that they just don’t have the capability of ascending out of that range, so you may limit depth.
Squatting Progressions
The first way is to simply remove the ball, toilet paper (unused), or paper towel. The reason this way is more challenging is because the ball creates a contraction of the adductors. Contracting the adductors allows the outlet to open up a little bit more easily, so when I don’t the ball there I have to be able to contract it enough.
To progress from that, descend into the bottom of the squat. As you inhale, reach the dowel away from the squat rack and hold position. You may or may not return the dowel to the rack as you ascend.
We’d like our clients to eventually progress to a free functional squat. You can use a kettlebell instead of a dowel to shift your weight back so I can get into that posterior outlet. (Video courtesy of my good friend Doug Kechijian)
From here, the next step would be a full functional squat. Shoot for at least thighs parallel to ground as a goal.
Functional Squat Regressions
A wall reach is a good first regression.
- Foot up against the wall.
- Tip of the toes is where heels will be.
- Ball between knees.
- Squat a short distance.
- Tuck hips so lower back is touching the wall. (should feel hamstrings, abs, and quads)
- Weight stays on heels.
- Reach forward
- Perform 5 breaths (quietly in through nose, fully exhale, 5-count pause).
What I’ll cue my clients to do is as they’re exhaling and as the ribcage is dropping, I want them to think about pulling the ribcage back into the wall and keeping it there as they inhale.
If the wall reach is too challenging, either put a small towel by their lower back (to reduce amount of lumbar flexion) or use a chair for support. A chair gives me something to push it so when I push I create a little bit more thoracic flexion, which positions my ribcage effectively.
Sum Up
Alright guys, I hope you found this video helpful. If you have any questions, comments, concerns, complaints, or if you have strategies that you guys like to use when you’re teaching squatting, just go ahead and leave some comments below.
The big takeaways:
- Squatting is an expression of mobility and inhibition of extensor muscles.
- Functional squats teach safe anterior tibial translation.
- Functional squats are not loaded exercises.
- Think heel contact, acromion over the mid foot, push the knees forward, and breathe.
- Progress to a counterweight functional squat, then to a free squat
- Shoot for at least thighs parallel to the ground as your goal.
- If you can’t squat, use wall reach variations.
Let’s keep on learning.
Recommended Relevant Resources
PRI Pelvis Restoration
Nature Knows Best
Photo Credits
CarpaltunnelEX
Gray’s Anatomy via wikicommons
By Peter van der Sluijs
Flickr
Jonathan108

