Table of Contents
That NO ONE looks at
Almost all painful shoulders neglect improving mobility in 1 key area. An area that services as the foundation for shoulder girdle function.
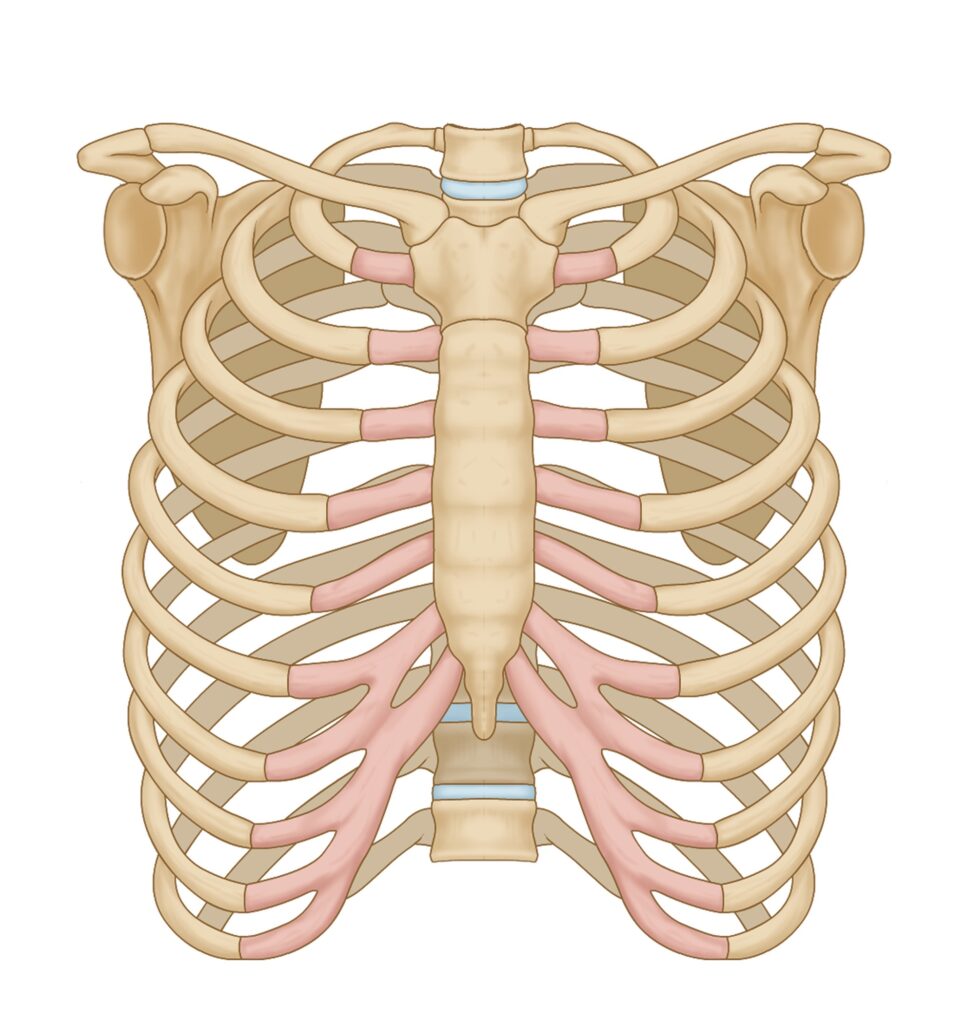
The ribcage.
That’s right, your ribcage isn’t only there to protect your vital organs. It’s the shoulder girdle’s base.
Improve the dynamics of this area, and most of those common shoulder issues will vanish.
Want to learn how? Check out the blog, video, and podcast below.
Shoulder Rehab’s Big Misconception
Does your shoulder rehab focus ONLY on shoulder joint mobility? With a few scapular stabilizing exercises for good measure?
STOP!
You need to hone in on our unsung hero, the ribcage.
Neglecting this area? That’s like building a skyscraper without first laying a strong foundation. Spoiler alert: it won’t stand for long.
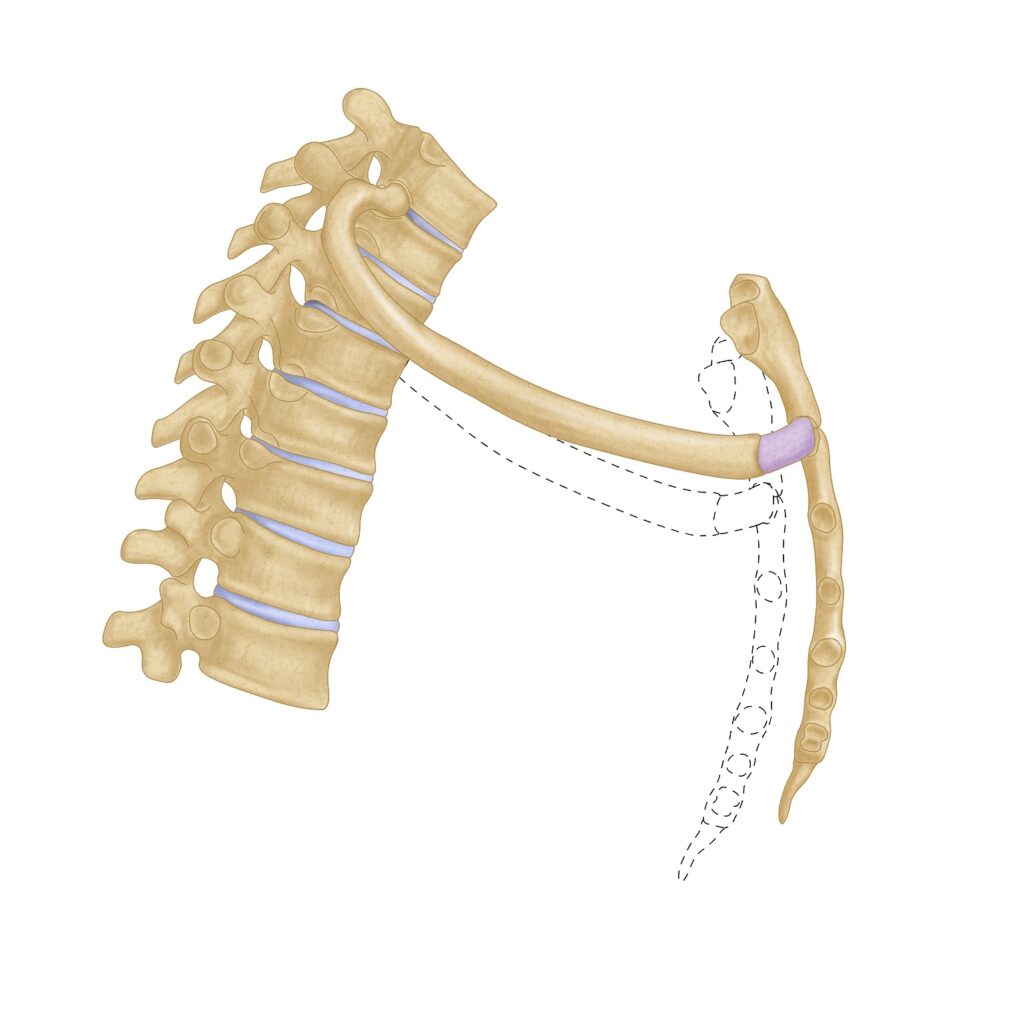
The Ribcage: Your Shoulder’s Secret Weapon
When you move your arm, your shoulder blades glide over the ribcage. Like your favorite hockey player on a smooth rink.
But this isn’t any rink. It’s a rink that can change its shape based on many factors. The position you are in and where air is can influence this shape.
Can’t change shape? Welcome to limited scapular and shoulder motion. When there is less motion, areas can get overloaded. OUCH!
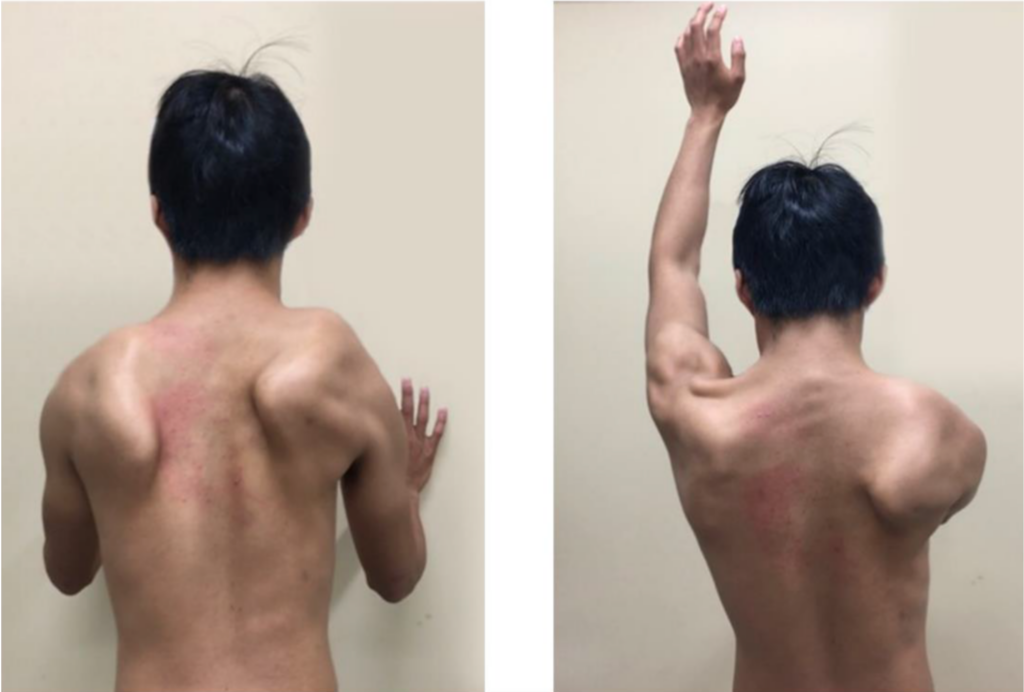
For instance, winging scapula looks like a shoulder blade problem. But what if my ribcage is forward compared to the scapular location?
You’ll get a faux-winging appearance. NOTHING happened to the shoulder blade–we simply changed the ribcage’s shape.
The goal is to alter the ribcage’s morphing capacity.
Our strategy? Breathing exercises that are designed to cultivate four specific qualities in the ribcage. But before we delve into these exercises, let’s discuss who this regimen is not intended for.
Who Should NOT Do These Moves: The 10 Percenters
This rehab strategy may not be suitable for everyone. If you experience any of the following:
- Shoulder hiking
- Numbness
- Tingling down your arms
- Sudden weakness
- Traumatic shoulder pain
- Dislocation
Seek immediate medical attention. Remember, folks, it’s critical to get medically cleared before performing any new exercises.
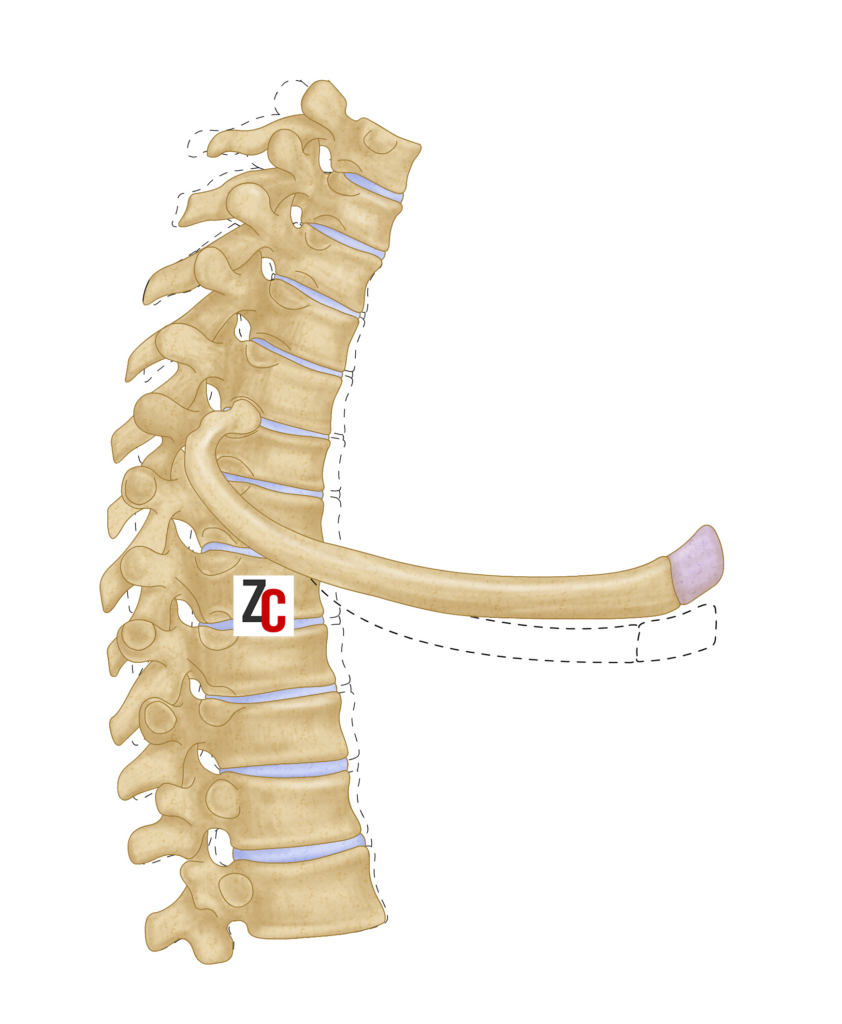
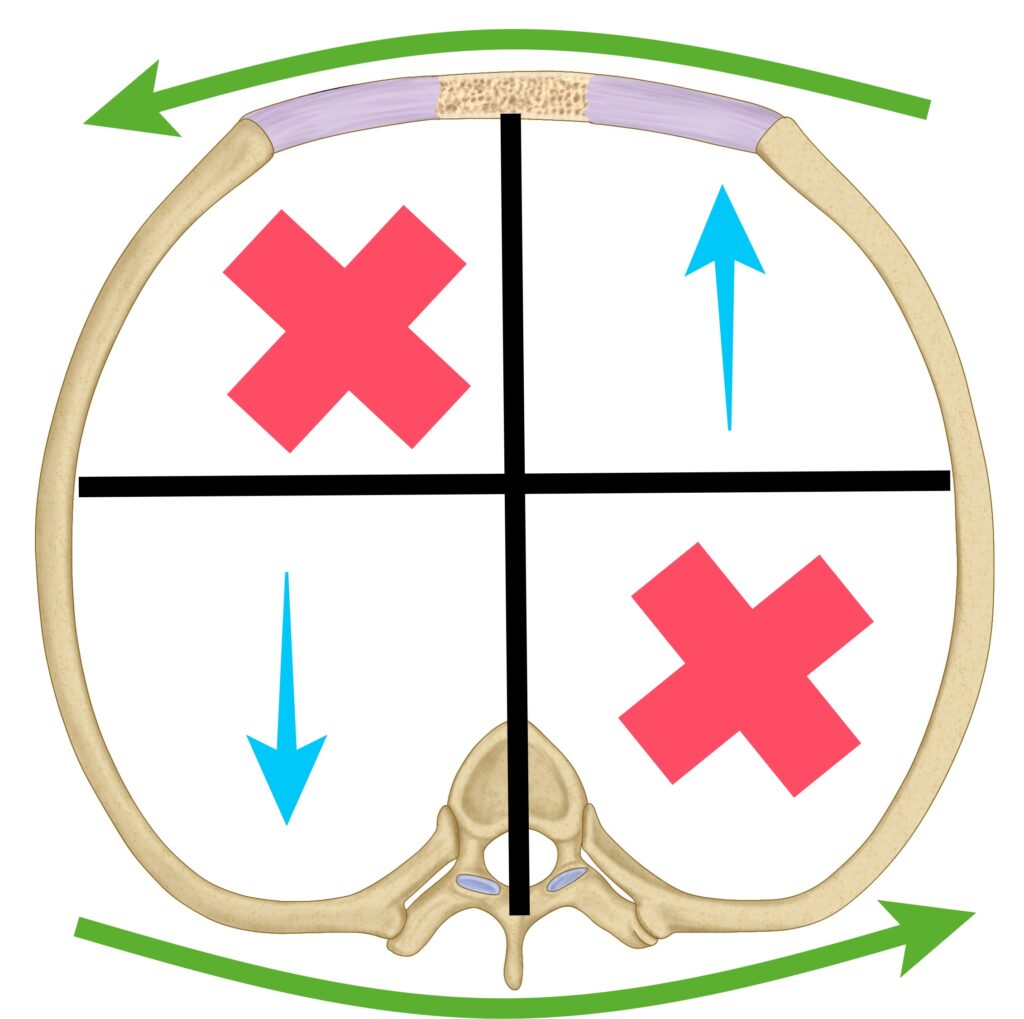
1. Change Ribcage Dimensions
The first mission is to alter your ribcage’s dimensions. Limited shoulder mobility often corresponds to a compressed anterior-posterior (front-to-back) ribcage dimension. This makes your ribcage wider side-to-side.
We want to give the ribs what they can’t do: expand the anterior to posterior dimensions. You’ll have more space to move your arms in front of you.
The exercise that will do that: Foam Roller Decompression Move with Abduction Reach
This exercise does 2 things:
- Expand the front-to-back ribcage dimensions
- Reduce rectus abdominis muscle activity.
Here’s how to do it:
- Get a foam roller. Position it on the ribcage, right beneath your armpit.
- Arrange your body to be parallel to the foam roller.
- Place your top foot at the lower part of the shin or the top part of your foot.
- Lay your weight onto the foam roller.
- Position your head straight ahead to the horizon.
- Reach your top arm slightly overhead.
- Silent inhale through the nose
- Slow mouth exhale while subtly reaching your arm overhead.
- Repeat for 5 breaths on each side. Do 3-4 sets, twice daily, for 2 weeks.
2. Posterior Thorax Expansion
Once you’ve gotten some ribcage shape change, time to move on to the next step:
Expand the ribcage. Bottom to top. Exactly how air naturally fills in the lungs.
The first place: the posterior thorax. Also known as dorsal rostral expansion.
During inhalation, the posterior ribs move backward and upward. With exhalation, they move downward and inward. Exercises that drive the inhalation action will be key.
AS LONG AS…
We do NOT force air into the upper back. When you force, you produce tension. When there is tension, there is NO expansion. your upper back to expand. The inhales should be quiet and easy.
Here’s the exercise for that: Seated Upper Back Expansion
The arm angle and shoulder rotation help drive posterior expansion.
Here’s how to do it:
- Get a yoga block and a light mini-band.
- Position the mini band below your hands and place the yoga block between your elbows.
- Keep your palms facing you, or go with a neutral grip if more comfortable.
- Hold the inner part of your elbow against the block.
- Look straight ahead, keeping your chest parallel to the wall.
- Silent nasal inhale
- Slow mouth exhale while moving your torso away from the block.
- Spin your arms out, maintaining contact with the yoga block.
- Repeat for 5 breaths, 5 sets, twice a day, for 2 weeks.
You can up the difficulty by getting the arms closer together.
2. Anterior Thorax Expansion
Next, we’re working on promoting anterior expansion or the “pump handle action.” This motion involves the ribcage and sternum moving forward and upward during inhalation. Upon exhalation, it moves downward and back. For those of you with rounded shoulders, you likely lack anterior expansion.
Elevated quadruped on elbows is the fix.
Being prone will promote anterior expansion due to gravity. The arm angle and ground contact drives the internal rotation needed for this.
Here’s how to do it:
- Position your arms to form a triangle, with your index finger and thumb forming a triangle (Jay-Z ROC)
- Glance up at your fingertips
- Start sagged
- Apply your weight through the pointy part of the elbow and the base of the wrist.
- Silent nasal inhale
- Slow mouth exhale
- Increase weight bearing through the forearm points during the exhale
- Repeat for 5 breaths, 5 sets, for 2 to 4 weeks.
To increase the difficulty, gradually lower the surface until you’re on the floor. You can also switch to a one-arm hold to add a rotational aspect.
4. Enhance Ribcage and Spinal Rotation
The final expansion comes when you fully extend overhead. This causes the ribcage and spine to rotate in a specific way.
Whatever arm is going up, the torso rotates toward that arm. For this to happen you must expand in the following areas:
- Ipsilateral posterior thorax
- Contralateral anterior thorax
So if my left arm goes overhead, you’d need left posterior and right anterior expansion.
The move for that? Downward Dog Ipsilateral Walk
The ipsilateral walk drives a subtle rotation. Having the arms overhead will drive uppermost thorax expansion.
Here’s how to do it:
- Start on your hands and knees.
- Make sure your hands are flat, weight through the wrist bone (pisiform) and the base of the index finger.
- Silent nasal inhale
- Exhale and ramp up weight through these points.
- Lift your knees and shift your weight backward.
- Inhale, step back with the same side arm and leg, keeping the hand flat.
- Exhale and bring the arms down.
- Repeat for the opposite side.
- Perform 4 sets of 5 steps per side, 2 times per day for 2-4 weeks.
Sum up
And there you have it, folks! This four-pronged approach is about attacking the REAL key to shoulder rehab. Our amazing ribcage.
It’s time to shed light on the critical role of the ribcage, so we can keep our shoulders healthy and happy.
To recap:
- The ribcage must be able to change shape to allow the scapulae to glide in all directions.
- Avoid these exercises if you have red flags.
- Step 1 – Increase Anterior-Posterior Dimensions
- Step 2 – Enhance Posterior Expansion
- Step 3 – Drive Anterior Expansion
- Step 4 – Rotate
Remember, improving shoulder mobility is a process. Don’t skip steps and trust that process.
Many people with shoulder pain may also have neck issues. If that’s you, I’d check out this post.