Table of Contents
If you nail these three keys, you’ll deadlift better than ever before
Hinging exercises (aka deadlifts, Romanian deadlifts, etc) can provide a TON of benefits for improving mobility, lower body strength, and power.
IF
You can perform these moves with great technique.
But if you are someone whose technique is meh and you feel all lower back and minimal torching of the glutes and hamstrings, then you might not be getting the most out of this awesome exercise.
Folks, what I’ve found is there are three keys to performing the hinge well. If you can hit these three components, there’s a good chance that you’ll:
- Increase how much the glutes and hamstrings work
- Improve your hip range of motion
- Feel a whole lot less low back discomfort
Want to learn how? Check out the post and video below.
Hinge biomechanics
Aside from working the posterior chain (back of the hips), how do we know a deadlift is a deadlift? What movement indicators show we are hinging? How do we separate a squat from a hinge?
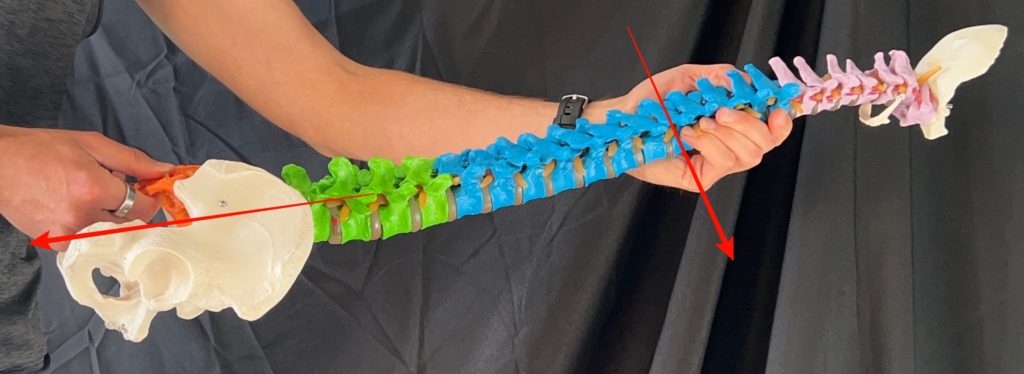
In my mind, there is a key action that happens with every hinge variation: sacral nutation.
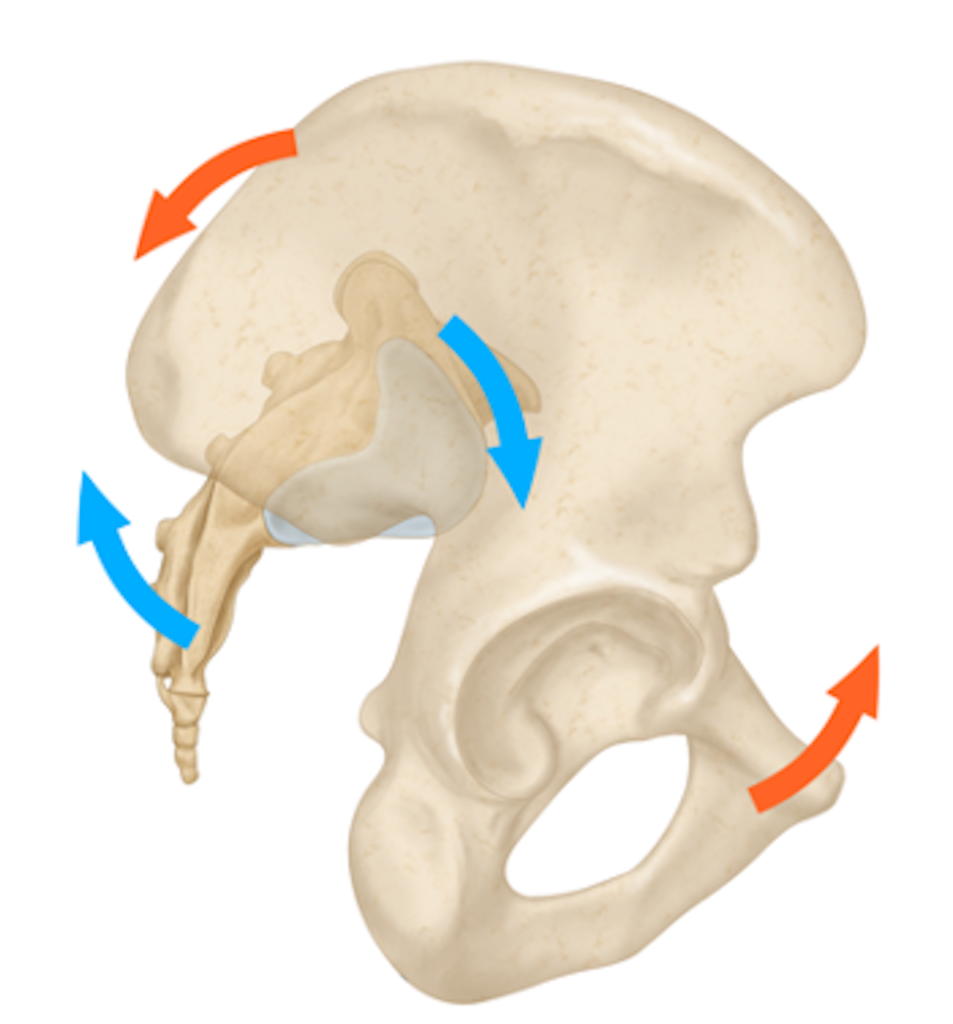
Sacral nutation involves the sacrum tipping forward and the pelvic bones rotating posteriorly. This action makes the posterior hips and pelvic floor (posterior pelvic outlet aka back of the hips) more eccentric, allowing you for horizontal hip displacement.
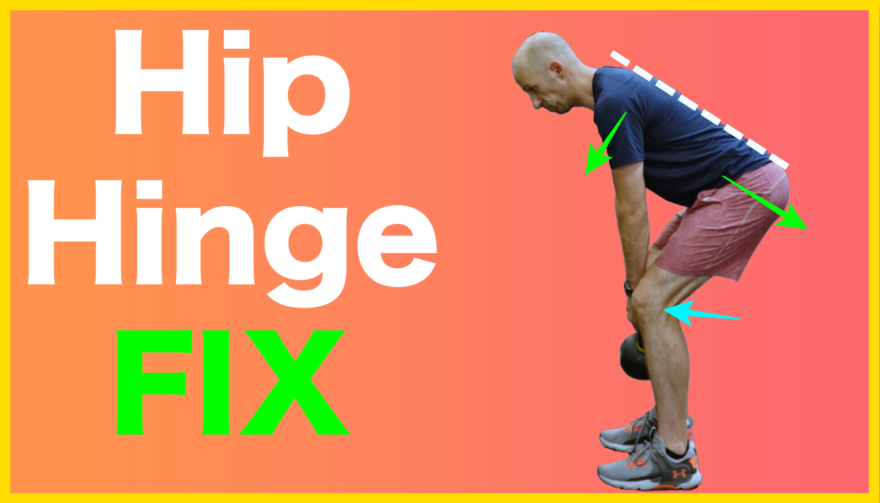
As the hips move backward, the torso should simultaneously move downwards. This position keeps the spine in an appropriate amount of extension needed to complete the lift.

If you hit these combined actions–hips backward and chest downward–you are likely to load the hips a TON and accomplish all your hinging goals.
To me, I’ve found 3 keys that will help achieve this goal:
Key 1 – Unlock knees
Run this quick experiment:
- Lock your knees out
- Keeping your knees locked, try to move your hips backwards (aka hinge)
How’d you do?
The likely answer = horrible. You might notice that you couldn’t move your hips very far back. Instead, you likely bent down more through your lower back.
Now think about this same action being applied to your heavy deadlift. If you lock your knees out at the start, you are going to have to create most of the motion through your lower back, which is going to minimize the workload through the hips. #lame.
Why does this happen? When you lock the knees, the glutes increase their muscular contribution to the action, as knee and hip extension are often paired actions.
If the glutes are engaged, then you can’t push your hips as far backward. You’ll be unable to overcome the muscle tension in the glutes.
Instead, you want the knees unlocked at the start of the deadlift. This slight bit of knee bend flexes the hips slightly, which reduces glute activity at the start, giving you the potential to push your hips back.
Key 2 – Hips back + chest down
This key is what we discussed in the biomechanics section. The trick is you want both of these actions to occur simultaneously. Sadly, these movements are tough to coordinate.
Some peeps may just arch their backs without letting the torso move downward.
Others may round through their lower back without pushing the hips backward.
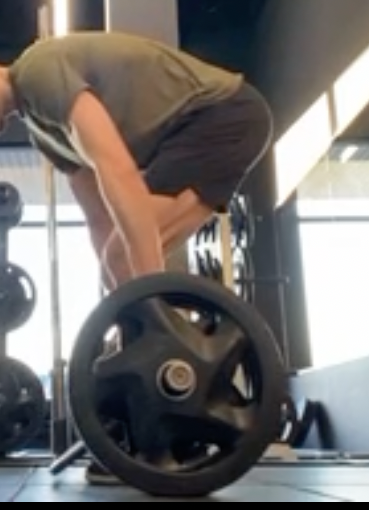
Instead, we want the hips to go back and the torso to go down at the same time.
If you can hit these two actions, you’ll ensure that the load is directed through the hips and the strain is minimized through the back.
The cues that I like to teach this are as follows:
- Karate chop at the waist
- Hips to wall and face to table
- Close the gap between your abs and thigh
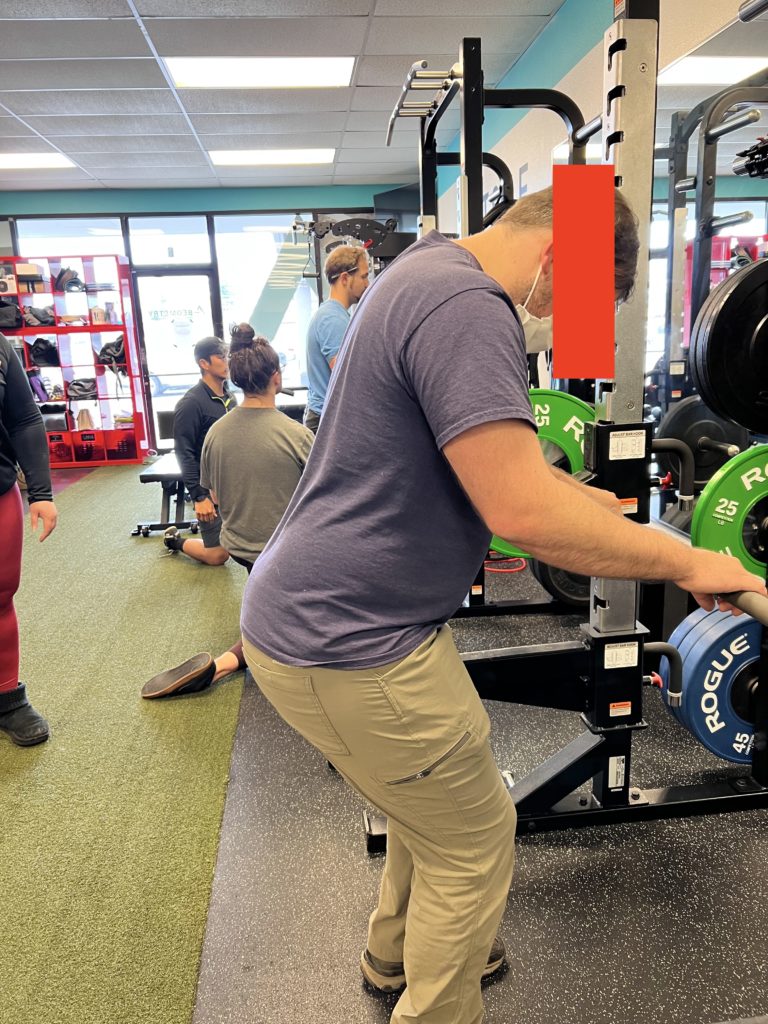
Key 3 – Bend knees once the hips stop moving backward
Sacral nutation is paired with lumbar extension, to which there is only about 15º available within the spine.
Why am I telling you this?
Well, fam, 15º is not a whole lotta range.
Therefore, the amount that the hips can travel backward is actually not that much.
In fact, once the hips stop traveling backward, that is when the “hinge” portion of the lift ought to stop. You’ve loaded the hips as best you can.
Now, pending what exercise you are doing, you have a couple of options.
If it’s most any Romanian deadlift or hinge-specific exercise, then you would return to the start position. Simple as that.
But what if you are doing an exercise where you have to set the bar on the ground? Think all deadlifts.
Simple–Bend the knees and maintain the spine position.
This will again, minimize load through the lumbar spine, and keep the focus and growing them legs!
Most people will screw this up by bending mostly through their lower back as they lower the weight, minimizing load through the hips.
The cue I use to fix this–slide your rear down the wall.
With this cue, you want to maintain the same pressure throughout. If you lead the wall, your bending through the lower back. If you push harder into the wall, you are relatively hyperextending your knees, which tightens the glutes that we want on stretch. Either = no beuno.
Sum up
If you can hit these keys on your hinge, the number of leg benefits you will receive will be second to none.
Here they are to recap:
- Hinging involves sacral nutation aka pushing the hips back
- Key 1 – Unlock knees
- Key 2 – Hips back and chest down
- Key 3 – Bend knees once hips stop moving
What struggles have you had on the hinge? Anything I’ve missed? Comment below and let the fam know!