Table of Contents
A New Way to Foam Roll
Foam rolling. It was all the rage for a long time. A staple.
Then it fell out of favor.
But the pendulum is shifting.
There’s a different way you can use a foam roller. A way that can get you MAJOR changes in your mobility.
It’s no longer about rolling out your muscles.
Read on to learn.
How Do We Actually Improve Mobility?
Want to improve mobility? Then you must understand relative motion.

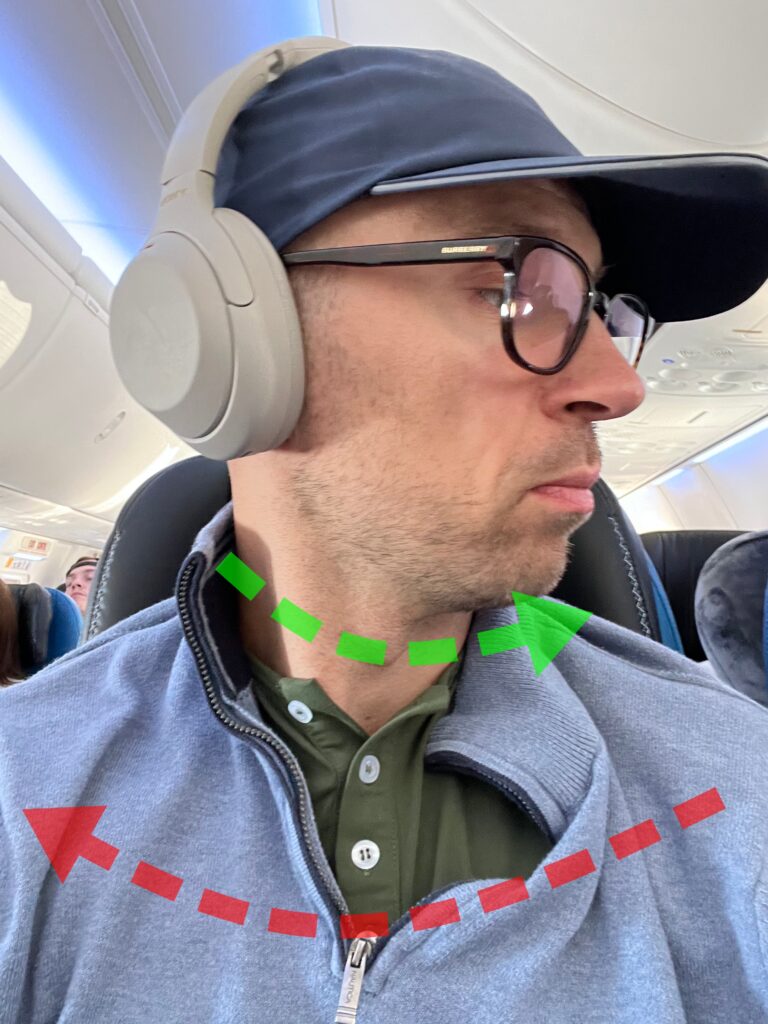
Relative motion is when bony segments can move in opposite directions of one another. For example, say I turn my head left. In this case, my torso is turned right in relation to my head.

To have full mobility, you MUST have relative motion.
What if you are stiff AF?
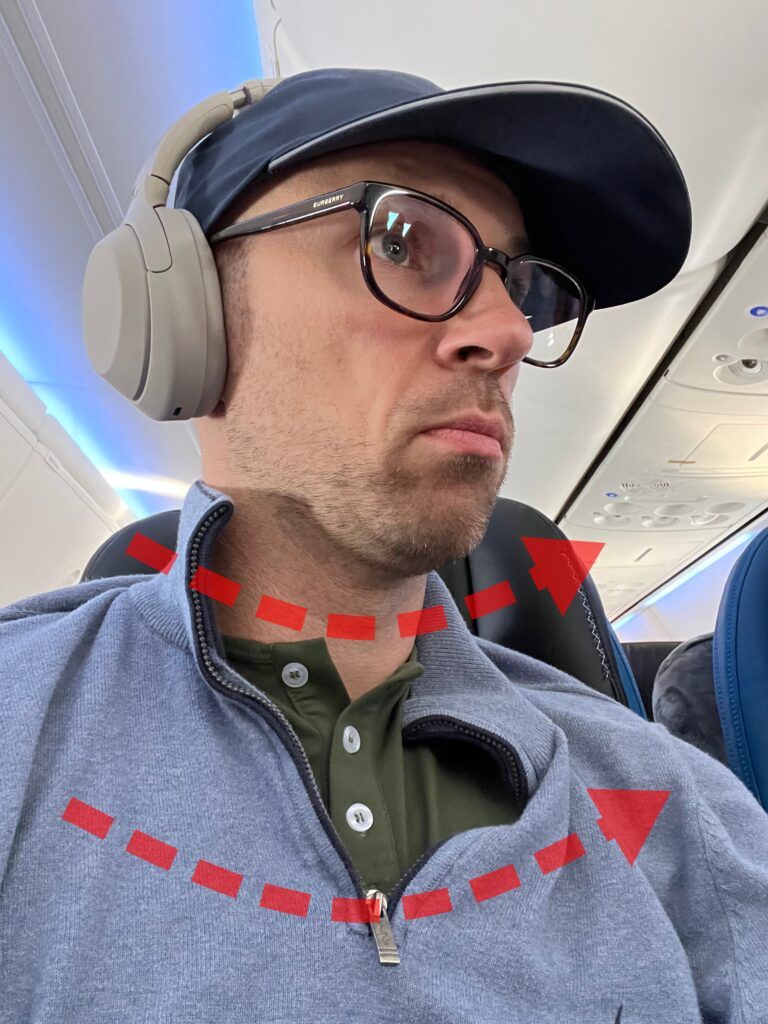
Then you lack relative motion. Instead, body segments move in the same direction. We call this orienting.

Take the same head turn example. If I turned both my head and torso to the left, I would orient together. Michael Keaton in the first Batman movie would be so proud!
So then what’s needed to capture this relative motion?
You need force applied in one area of the body. This force allows for expansion in the exact opposite area of the applied force. This creates two movements in the opposite direction.
This is where the foam roller comes into play!
Rethinking Foam Rolling
Suppose you have someone that tenses up with EVERYTHING. I’m talking using like every muscle ever.

In this case, they are like Oprah Winfrey with force production. This muscle produces force. That muscle. ALL MUSCLES.
Gaining motion requires reduced muscle activity. But this puts us in a tough spot with this person.
Enter the foam roller.

We can use the foam roller to apply force externally. Thereby promoting the expansion we need. You’ll be moving like a boss at the end.
I’ve found these 4 exercises useful in this regard.
Exercise 1: Thorax Mobility
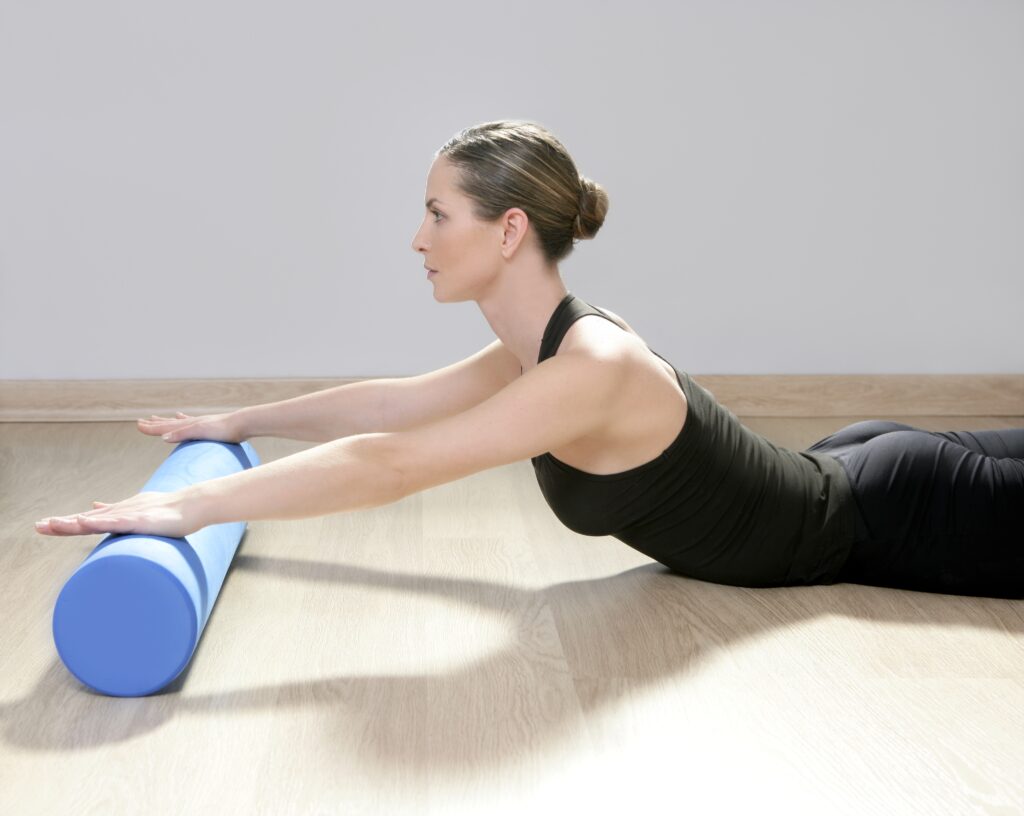
A foam roller on the ribs can increase front-to-back dimensions. The bigger you are in this direction, the better you can rotate.
- Lie on your side with the foam roller at chest height.
- Side bend over the roller. The torso will be parallel to the ground
- Neck relaxed
- Quiet nasal inhale
- Soft mouth exhale. Melt into the foam roller
- keep sagging!
- Perform 4 sets of 5 breaths per side, twice daily.
If this move is HELLA sore on the ribcage, a pillow or pad atop the foam roller works well.
Exercise 2: Pelvic Mobility
Same principles as the thorax one. This time. Pelvis edition.
- Place the foam roller at the top of your pelvis.
- Lie over it, rolling your body forward to emphasize bottom-outside knee contact.
- Quiet nasal inhale. Roll backward
- The outside knee stays on the ground
- Soft mouth exhale. Return to the start position.
- Perform 3 sets of 10 turns per side, twice daily.
Exercise 3: Knee Mobility
Your knee is NOT a hinge joint. It rotates as you bend and straighten.
Knee flexion = Tibial internal rotation + femoral external rotation
Knee extension = Tibial external rotation + femoral internal rotation
We can use the foam roller to help with this movement. Here, the foam roller fixes the tibial IR, allowing for better bending.
- Position the tibial tuberosity on the roller.
- Roll the tibia into IR
- Rock back, bending the knee, then straighten up, incorporating breathing.
- Do 2-3 sets of 10 reps per side, twice daily.
Exercise 4: Nice Stride
This movement puts it all together, improving rotation through the hips. I also like it because it teaches you to create the shape change in standing.
- Stand with the foam roller against your pelvis, one leg fixed on the ground.
- Let the other leg hover. Inhale to bring the knee up, exhale to lower.
- Perform 2-3 sets of 10 reps per side.
Sum up
Using a foam roller to apply force onto bones has been a GAME CHANGER for improving my client’s mobility. If you ever see someone who produces a ton of tension, this is a great first step.
But where do you go after that? There are actually 5 exercises I prescribe for a bunch of my clients that take care of a lot of movement problems. Check it out here.

