Table of Contents
A Complete Biomechanics Guide
Introduction
Improving neck, shoulder, and trunk mobility starts with understanding ribcage mobility. The challenge? It’s confusing to figure out how to bias exercises to maximize movement in these areas.
But today, that confusion ends. In this blog, we’ll break down ribcage biomechanics, how to identify where expansion is limited, and the best exercises to improve mobility. This content dives deep into the weeds for movement professionals. If you just want the exercises, there’s a video at the end.
Ribcage Biomechanics
The ribs move in three key ways:
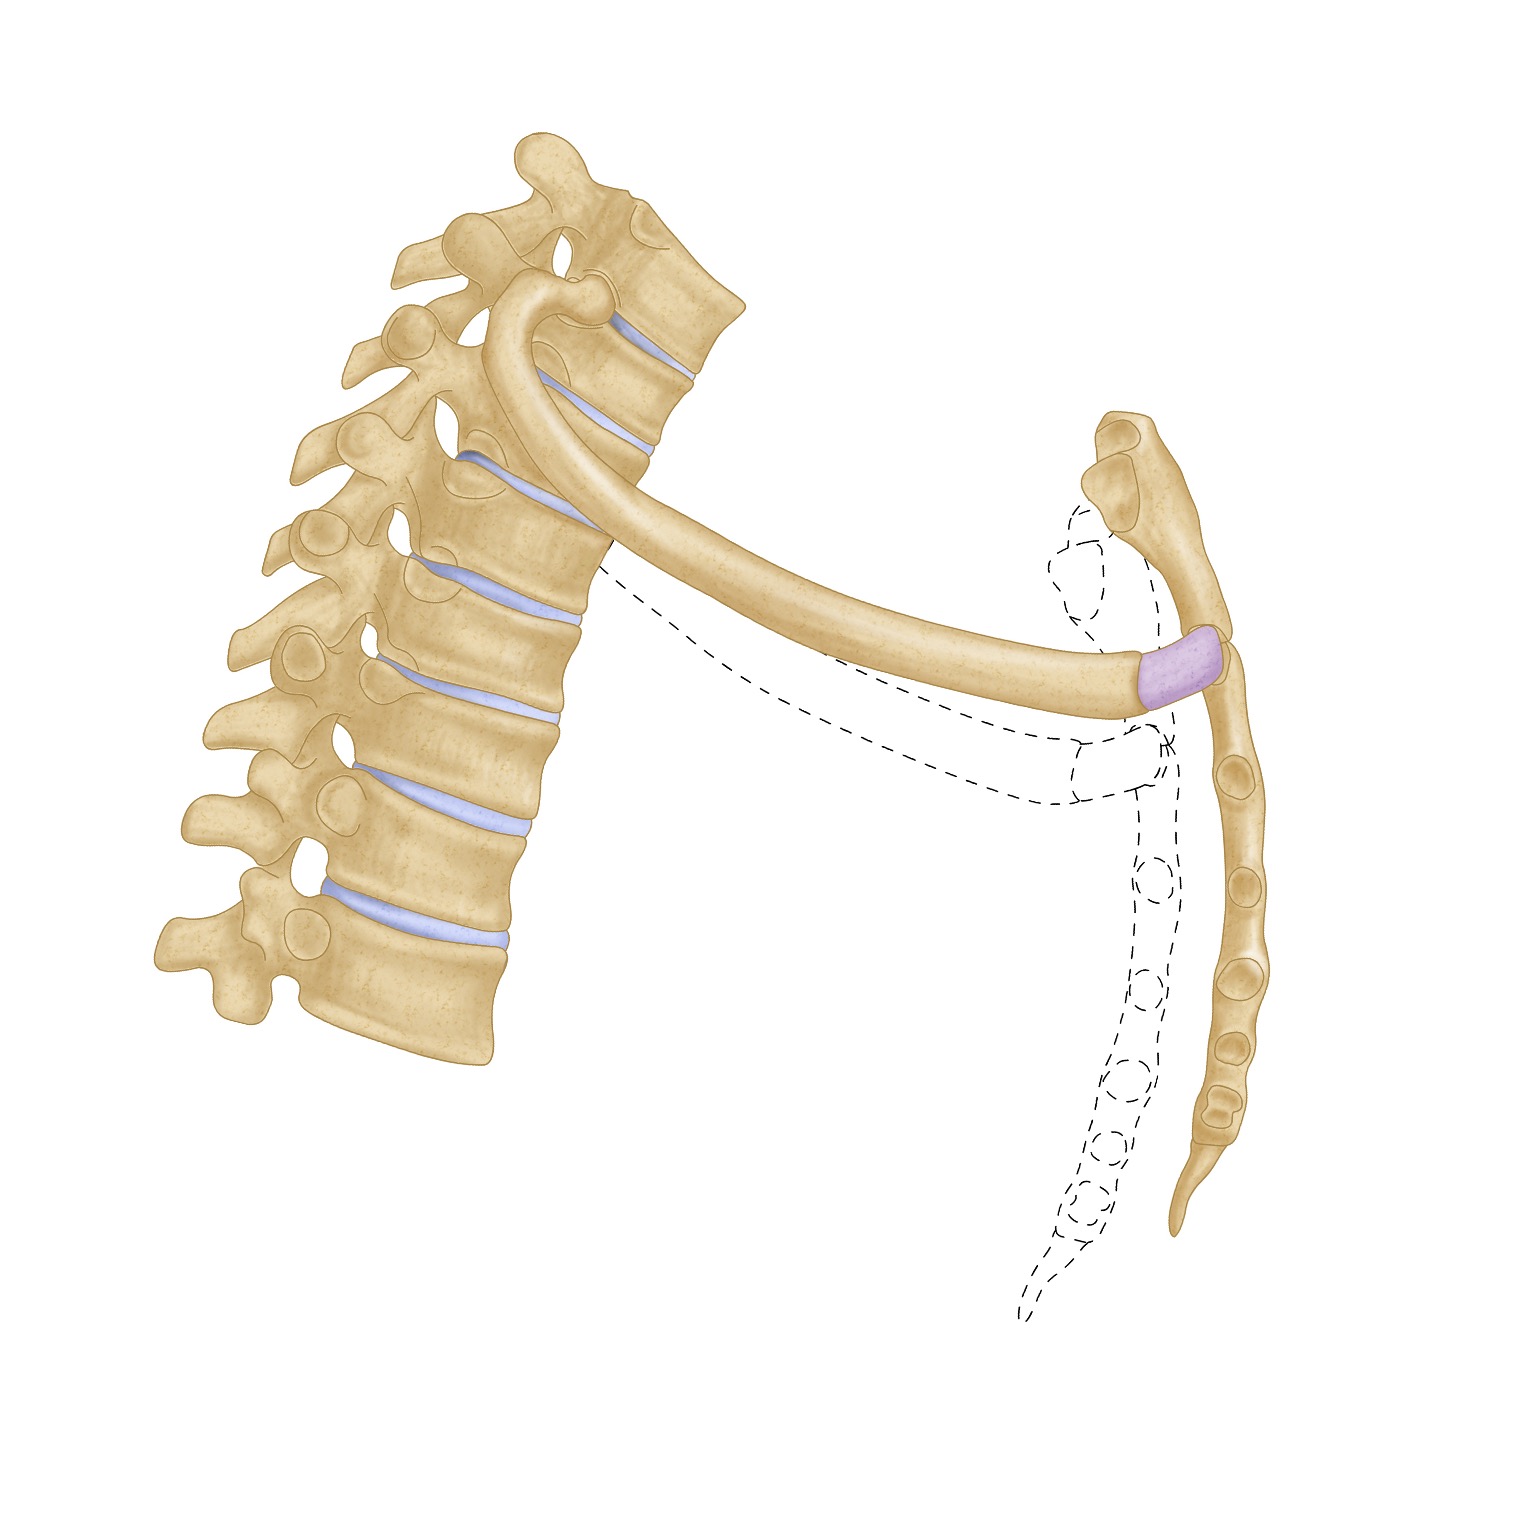


- Pump Handle: Up and forward movement of the sternal (1-7) ribs).
- Bucket Handle: Outward and upward movement of the ribs (mostly lower, 8-12).
- Posterior Expansion: Backward and upward Movement of the upper six ribs (also called dorsal rostral expansion).
These basic movements change when it comes to physical activity, affecting how air flows and expands within the ribcage.
Understanding Expansion
During movement, airflow in the ribcage expands along two diagonals, divided by ribs 1-7 and ribs 8-12:

- Posterior Upper and Anterior Lower: Linked to external rotation (ER).
- Posterior Lower and Anterior Upper: Linked to internal rotation (IR).
Individuals with narrower, vertically shaped ribcages often have more access to ER. Wider ribcages usually allow easier access to IR. However, compression in these areas can distort this access. This changes what motions are available in these individuals.
Testing Ribcage Mobility
Relying on posture or breathing observation isn’t reliable. Instead, test ribcage mobility by measuring shoulder rotation in specific areas:
- Posterior Upper: ER at 0° abduction
- Posterior Lower: IR at 90°
- Anterior Lower: ER at 90°
- Anterior Upper: Apley IR (reaching behind the back)
These tests will reveal ribcage restrictions and help determine which mobility restrictions to target first. The approach should follow three principles:
- Superficial Before Deep: Address superficial restrictions first.
- ER Before IR: Focus on external rotation before internal rotation.
- Bottom-Up: Start with the lower ribcage before moving up.
Treatment Strategies
Superficial Before Deep
When someone has multidirectional restrictions, they lack space to move. The first step is to expand the front-to-back dimensions of the ribcage. Think of squeezing the sides to open up the front and back.
Here are the strategies to use:
- Side-Lying Exercises
- Using Props: Yoga blocks, foam pads, or weighted items like sandbags.
- Low-Tension Activities: Slow, flowing movements.
- Side Ab Moves: Engage the obliques to create lateral compression.
Below is one of my favorite starting moves:
Once you fully restore a rotation (either ER or IR) on both sides, then you can move on to more specific expansion strategies.
Anterior Lower Expansion (ALOW)
External rotation (ER) creates the space needed to shift your center of gravity backward. This shift increases overall rotation capacity. Start by expanding the anterior lower region, which is crucial for those who tend to slouch.
Effective strategies include:
- Backward bend progression
- Prone
These exercises help relax the rectus abdominis muscle, allowing better expansion in the anterior lower area.
The crime scene pose is one of my favorite starting points:
Posterior Lower Expansion (PLOW)
Posterior lower expansion minimizes excessive arching and ensures proper upper thorax filling. Think of it as working like a stress ball—apply pressure in specific areas to expand others.
Try these approaches:
- 90-120° Shoulder Flexion
- IR Contact Points: Medial elbow, pisiform
- Weight-Bearing Exercises
This move is a great starting point for this:
Posterior Upper Expansion (PUP)
Now it’s time to expand the upper ribs, filling the ribcage from bottom to top. Use similar tactics to those applied to the lower thorax, but focus on the upper regions.
Key strategies include:
- 0-60° Shoulder Flexion
- ER Contact Points: Anything lateral, such as lateral elbow
- Non-Weight-Bearing Exercises
This is an example of a great low reach move for this:
Anterior Upper Expansion (AUP)
Few people will reach this point, as it requires significant expansion. But when needed, focus on exercises that drive air into the front of the chest, such as rowing variations and pulldowns.
Adding some sidebending into the mix is a game changer:
Conclusion
The biggest mistake movement professionals make is knowing all the biomechanics but failing to coach people into proper positions. That’s why mastering the stack is crucial—it ensures effective ribcage expansion.
If you want to learn how to coach these techniques, check out this post here. Get the most out of your mobility training and help others improve their function and performance.