Table of Contents
Understanding Lateral Pelvic Tilt
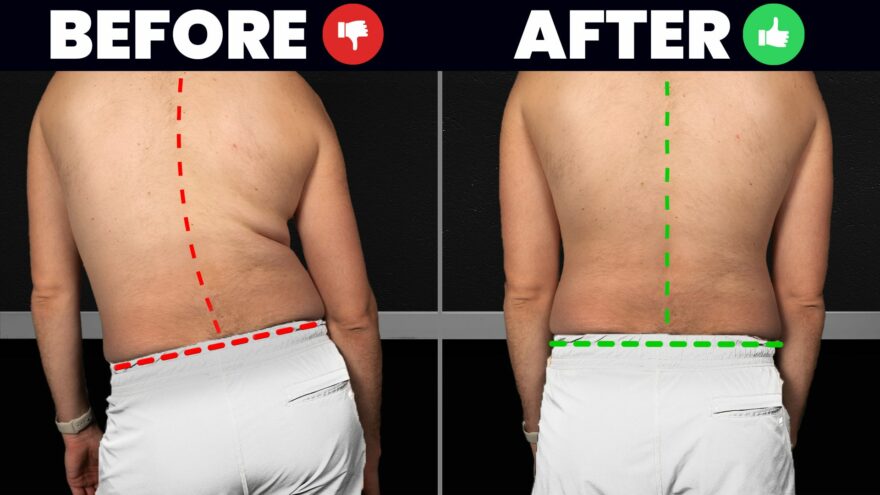
Lateral pelvic tilt is when one hip looks or feels higher than the other. Sadly, there is a TON of misinformation and poor treatments surrounding this posture. If you were ever told to shift or hike the hip the other way, you’ve fell victim to this.
These common fixes don’t restore the necessary segmental motion to fix this for good.
That changes today.
I’ll show you how to restore segmental motion so you get the desired changes in this posture.
Lateral Pelvic Tilt Biomechanics
We name lateral pelvic tilt as follows:

- Tilt = direction the spine is facing
- Opposite hip is high
- Same side hip is low
For instance, a higher right hip indicates a left lateral pelvic tilt, and vice versa.
This positions comes with the following limitations:
- High hip: ⬇️ External Rotation
- Low hip: ⬇️ Internal Rotation
Before Going After the Lateral Pelvic Tilt
It’s not uncommon to have limited rotation on both sides. If that was you, I’d start with these moves:
1. Swiss Ball Weight Shift
- Grab a Swiss ball and place it between your shins and hands.
- Weight bear on four points: each PSIS (top bony part of the pelvis) and between the shoulder blades.
- Inhale through the nose and, on the exhale, shift your weight to one PSIS and upper back.
- Alternate weight-bearing between each side. Sync it with the breathing per above.
- Perform 2-3 sets of 6-10 rotations per side, twice daily for 2-4 weeks.
2. Wall Squat
- Stand a foot’s length away from the wall.
- Weight bear on three points: the PSIS, inner heel, and base of the big toe.
- Use a band around the knees to keep them centered.
- Slide down into a quarter squat, holding a kettlebell at chest height.
- Maintain eye contact forward.
- Inhale through the nose and exhale softly through the mouth.
- Hold for five breaths, performing five sets twice daily for 2-4 weeks.
How to Fix Lateral Pelvic Tilt
With these next two moves, have the high hip be the down leg.
1. Five Month Breathing
- Lie on your side and log roll your torso to contact two points: the bottom outside knee and elbow.
- Use wedges under your thigh and arm if needed.
- Inhale silently through the nose and, on the exhale, press upward through these points.
- Maintain a 3-4/10 effort, avoiding sagging between breaths.
- Perform five sets of five breaths, twice daily for 2-4 weeks.
2. Low Z Sit
- Sit in a 90-90 position.
- Fall to your forearm, rotating your hand down to weight bear through the pisiform.
- Subtly roll your body forward to contact the bottom outside knee.
- Inhale silently through the nose and, on the exhale, push up through three points.
- Perform five sets of five breaths, twice daily for 2-4 weeks.
You can then progress to more challenging variations. Keep the high side the working leg.
3. Front Foot Elevated Split Squat with a Slant
- Raise the front leg to unweight it and limit lateral tilt.
- Keep eyes forward and hold a kettlebell at chest height.
- Inhale through the nose and exhale at the start.
- Drop down into a quarter squat, feeling the front quad and glute engage.
- Perform five sets of five breaths, twice daily for 2-4 weeks.
Then, you’ll want to push outward with the working hiked side. Now you can shift the other way with a low likelihood of problems.
4. Lateral Squat
- Use a stance slightly wider than hip-width.
- Push from the higher hip side into the lower side.
- Maintain a straight line from eye to chest to hip to knee to foot.
- Perform three to four sets of eight to 12 reps.
Sum Up
Addressing lateral pelvic tilt requires knowing the biomechanics. Once you know this, your exercise selection can actually make a difference. Your mobility will be WAY better with these strategies. Don’t rush through the process.

