Table of Contents
If you notice your hips don’t stay level during stairs, then check this out!
Does your hip ever drop down and rotate funky when you are doing exercises like step-ups and downs? Do you ever wonder why?
Well, we cover the why and some fixes in today’s post, where I go through a case study that dealt with this exact issue.
And the fix only took 3 exercises.
Case overview
This case deals with one of our golfers at Elevate Sports Performance and Healthcare who I’ve seen over the years. He came to me complaining of right knee pain, with the most aggravating factor being stairs and step exercises.
He did have a flare-up during a tournament as well, to which we needed to address this issue like uh….NOW
Session 1 objective findings
You’ll notice that this client has A TON of external rotation and internal rotation has been a little on the sus side, common with narrow infrasternal angle presentations. Typically, we’d address these individuals by performing activities that drive sacral nutation and hip internal rotation.
But here’s the problem.
We’ve been doing that until we are BLUE IN THE FACE.
We needed to look deeper.
It is in this scenario that we have to notice the asymmetries that are present. What stands out to me is the reduced left external rotation compared to the right (even though both are within normal limits), and limited right internal rotation compared to the left.
With this strategy, you have concentric muscle activity in the left posterior and right anterior regions of the pelvis, which turn it to the right. The reason why it’s called a flat turn is that it keeps on a superior to inferior axis without obliquity.

Conventionally, the flat turn presents with the following measures:
Intervention selection
Quadruped on elbows with left hip shift
I chose this move for a few reasons:
- The quadruped on elbows position will bias anterior expansion and improve buckethandle dynamics for a narrow ISA
- The hip shift to the left will drive the upper pelvic expansion we needed
Supine to sidelying roll – right to left
This movement drives A TON of right internal rotation by reaching with both the arm and leg at 90 degree flexion angles, as these reaches will promote IR.
With the positive results we had, I opted to have this person perform these two moves two times per day.
Session 2 overview
Three weeks later, I saw this client again, and he was complaining that his knee gave out and had a lot of pain at a tournament, to the point where he could barely squat. The home exercise program went well, but was difficult to execute on the road.
So we went under the hood to see what we needed to do (in parentheses were the numbers from the first session if there were improvements):
You’ll notice that we have some small changes compared to our first session. The decreased right external rotation and increased right internal rotation indicate a reduction in the flat turn, and I’m super juiced that we had some nice changes in shoulder flexion, hip extension, and hip flexion.
But did you notice the straight leg raise was even more asymmetrical? As in, more different than what we’d expect in the flat turn?
That’s when I started to notice why this pattern presented.
The patient was exhibiting a right lateral pelvic tilt whenever he has to produce internal rotation.
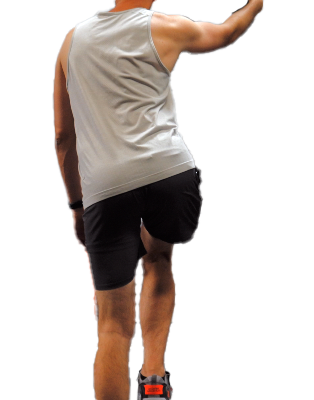
When I asked this person to perform some of the moves we will discuss soon, his pelvis would tilt to the right. This finding was especially prominent during the step up exercise.
With this strategy, the right femur will be more adducted (contributing to the knee pain) and the left femur will be relatively abducted. The latter now explains why the straight leg raise on the left was more than the right.
Intervention selection
Our focus this session was a two-fer as we say in the midwest:
- Continue progressing the turn to the left
- Laterally tilt/approximate to the left to “even out” the hips
- Here’s how we did it.
Quadruped left hip shift
This move was where I initially noticed the lateral pelvic tilt, as the hip shift requires right internal rotation to occur. Our boy couldn’t do it, then compensated in this fashion. I coached him to keep his hip long on the right, and this was able to salvage the move.
Standing left hip approximation
This move was BALLER. Here, the client had to basically create a hip shift in the opposing direction of the lateral pelvic tilt, which would drive a bunch of right internal rotation based on the sacrum tipping right.
Step downs with hip shift
Post-treatment debrief and recommendations
We got a really nice change after this second session. I recommended that he perform these new moves two times per day, and in training focus on the following pieces:
- No tucking (given the large external rotation amount, he likely had swayback elements)
- Continue to drive internal rotation
- Hike the left hip with any single leg moves
The four steps to improving a flat turn pelvis
This case helped me FINALLY figure out what I think is the most effective sequence for dealing with individuals who present with this asymmetrical presentation.
Although the overall goal is to drive a left turn by expanding the left posterior and right anterior portions of the pelvis, there is a specific sequence which will ensure the most success:
- Stack (to position for normal respiratory mechanics)
- Expand the left posterior pelvis (to increase external rotation)
- Left hip approximation/hiking (to increase early range right internal rotation)
- Orient pelvis right, then turn left (to increase late-range right internal rotation and early range left external rotation)
If you do these steps, you ought to be in bidness!
Photo credit
Photo by Kindel Media: https://www.pexels.com/photo/a-woman-having-a-knee-pain-7298659/